Back on the trail again
Idea
I recently started running again after stopping for nearly ten years due to injuries. To get some exercise, I started back on my mountain bike and rode on nearby trails. Later, I would ride and run a lap. Before, I could only get about half a mile in before my knee started acting up, but now I found I could go a full lap (about 1.4 miles) without any issues. I started running twice a week and now up to three times a week. I stayed on the Dirty Spokes trail-race mailing list for the past ten years thinking someday I’d sign up for a run again, and I finally did. It was over ten years since my last Dirty Spoke run, and to celebrate, I made a pop-up card.
Design
I wanted to do a running figure with the arms and legs moving, which meant using pivots with a pull tab as I did in the March 2022 pop-up. One issue that first comes up is that the legs and arms move in opposite directions but on the same pivot point. I knew that would be the trickiest part of this card. To see if it was even feasible, I made a small sketch.
 Sketch
For each set of limbs, there would be two pivot arms attached be one point. The tab that moved the arms would have a hole above the pivot to move one arm clockwise, and a hole below the pivot to move the other counterclockwise. The plus sign in the sketch above is the pivot point, and you can see the holes for each pivot arm. As the white tab is pulled left, the yellow arm moves clockwise, and the green arm moves counterclockwise.
As you may imagine, since the arms move in opposite directions and cross each other, avoiding collisions would be a challenge.
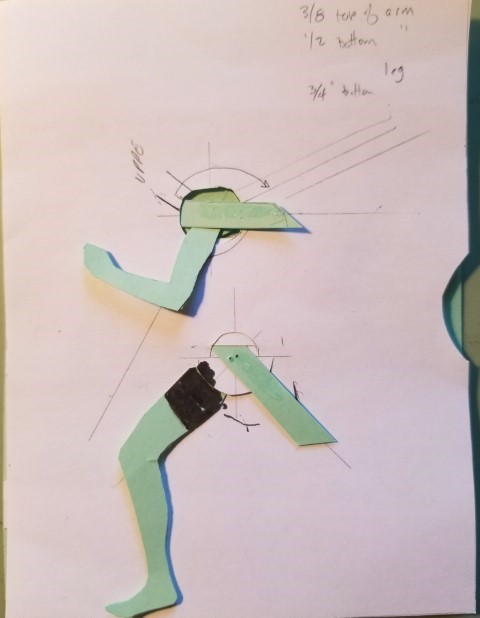
Initially, I was thinking of using 90° pivots for both limbs, but after looking at Eadweard Muybridge’s photos of a running man I found that the legs moved about 90°, but the arms moved about 120° as shown below in an annotated frame.
 Running man
Since the arms and legs moved different angles with the same pull of the tab, that meant the holes for the moving arms had to be at different distances from the pivot point. I did some full-size sketches to test things out, which took much more time than I thought it would, but I finally got it to work.
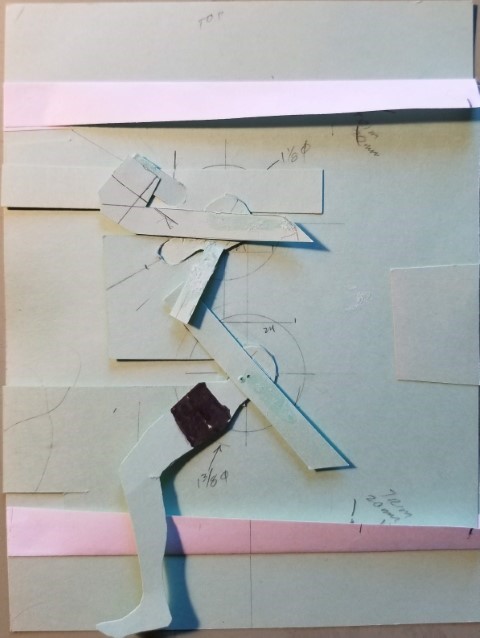
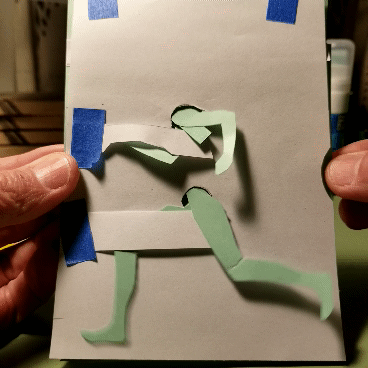
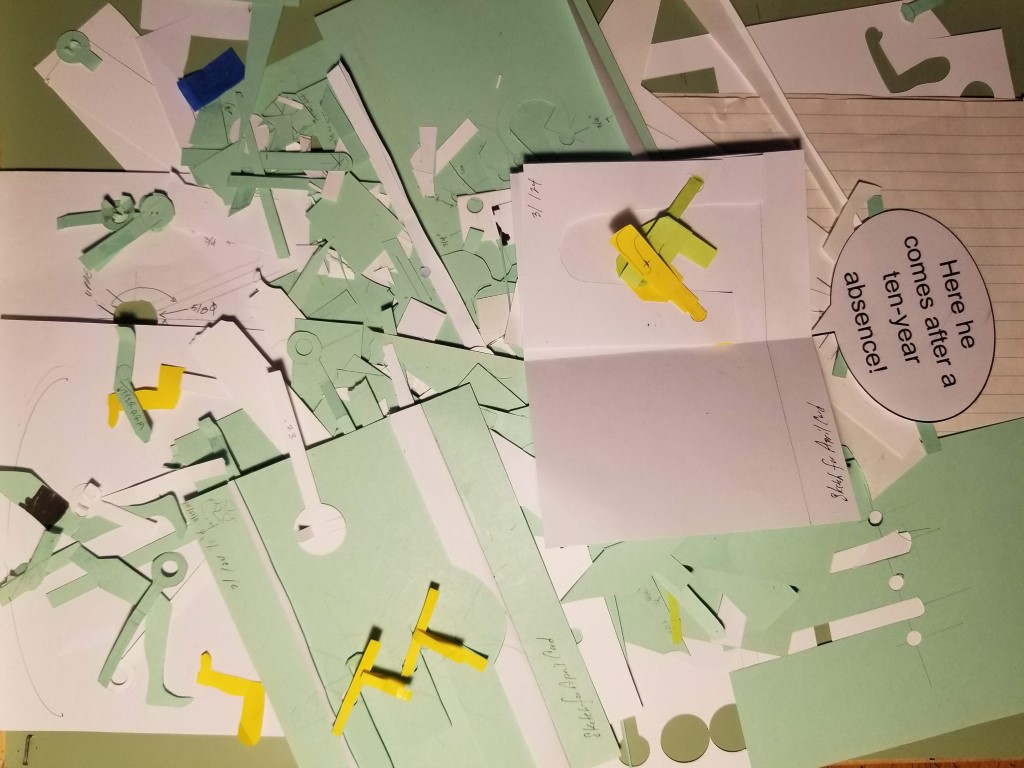
Here’s a series of photos putting together the final sketch1
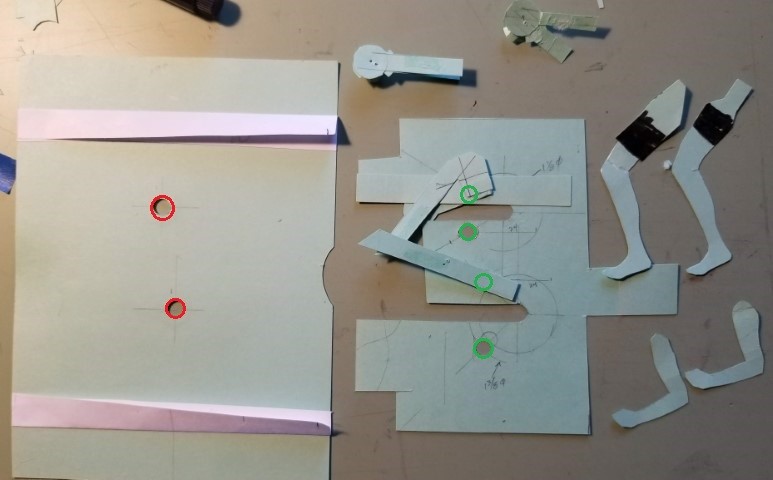
Step 1 has all the mechanism parts. The left part is the base with guides for the odd-shaped pull to the right of it. The red circles are the pivot points. The green circles on the tab are where the pivot arms go through it. The pivot arms for the right limbs are already through the upper holes of the tab. These go through the tab from underneath it, to avoid colliding pivot arms for the left limbs.
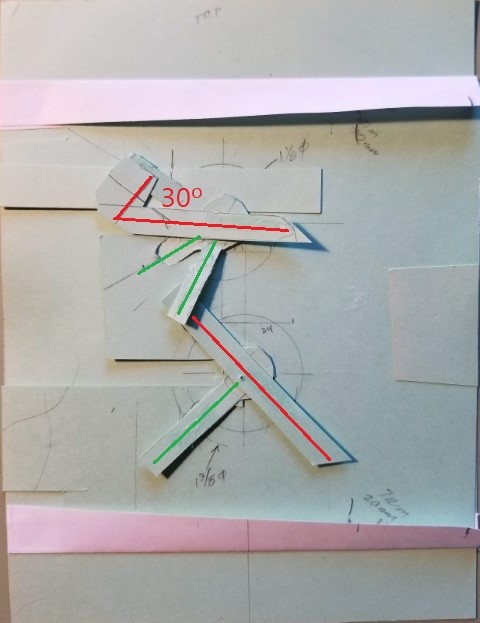
Step 2 has the tab in place and the other pivot arms through the holes. The left limb’s arms go through the tab holes from above, then another layer of card is added to strengthen and extend them. At this point, the arms will move but collide. The legs can be attached to pivot arms as-is since the angles match the legs’ positions. For the arms, the pivot arm’s angle and the arm angle differ by 30°, as shown by the upper lines below. The red lines are for the left limbs, and the green lines are for the right limbs.
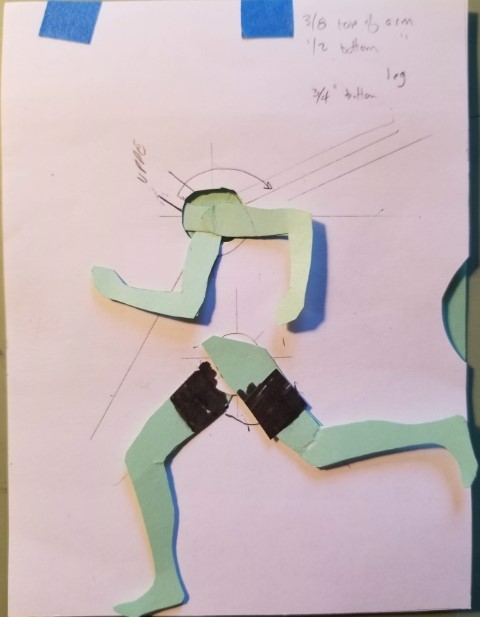
Here’s an earlier sketch in motion. I’ve bent the card to avoid collisions.
Step 3 has the right leg attached to the pivot arm.
Step 4 adds a piece of paper to keep the arm and leg pivot arms from colliding since in the previous photo you can see they will overlap.
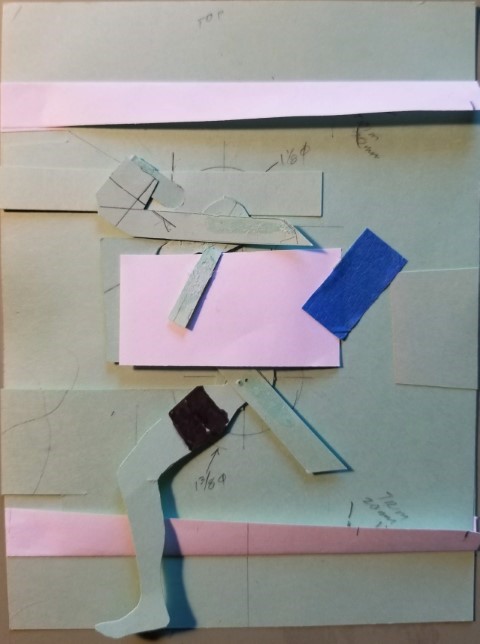
Step 5 adds the main background of the card and the right arm. The legs have separate, curved slots to keep them from colliding. Both arms stick through the same hole since a torso layer will separate them.
Step 6 has both arms and legs are attached. At this point, the legs do pretty well avoiding each other, but the arms will still collide.
Here’s an earlier sketch of the mechanism in motion. I used this sketch to figure out how to avoid collisions with the scraps taped to the base.
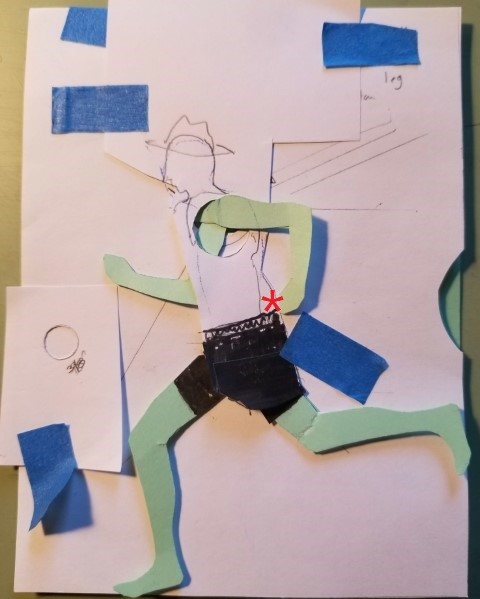
Step 7 adds the torso that has the right arm under and the left arm over. The arms are now separated and didn’t collide. One thing to watch out for on the arms is that if they go beyond the torso when moving left, they may go on the wrong side of it when moving back. For example, the right arm is under the torso, and if the hand goes too far left, on return it could go above the torso, catching on it. The avoid that, I’d be careful to limit their movement to the red asterisk.
The final step is a refinement of the large arm hole in the previous step to see how small I could make it. I wanted to make it as invisible as possible.
Here’s the final mechanism assembled.
 Final mechanism
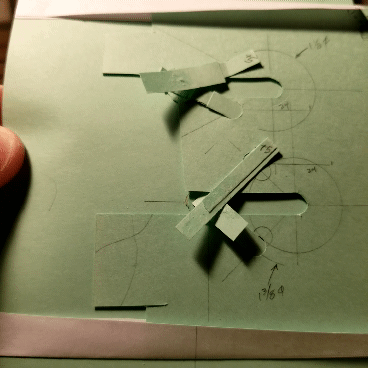
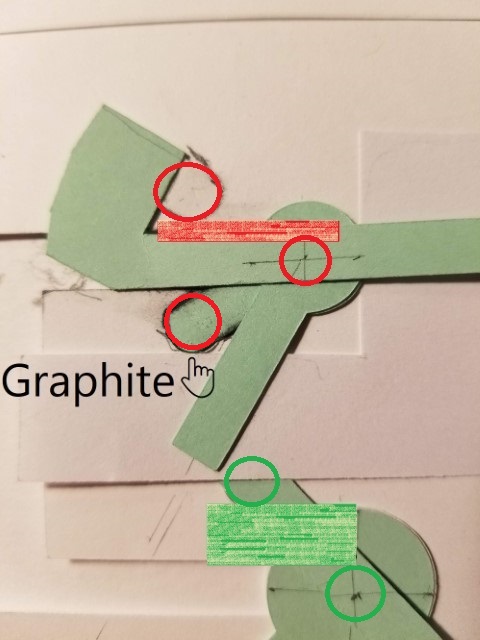
Although I did many sketches, the final mechanism seemed to catch a bit. I don’t know if it was the type of paper in the final version or bad luck. I narrowed down the problem to the left arm’s pivot. If I removed that, all three other limbs worked very smoothly. I recut the parts a few more times and even lubricated it with graphite as shown below, and that seemed to help.
 Lubing it up
I think the problem was with the small distance between the upper and lower pivots that forced me to put the holes for the arms too close to the pivot points (red circles). To get the arms to move 120° the hole had to be pretty close to the pivot point, which didn’t give much leverage and caused stress on the pivot itself. In the photo above the red box show the height between the arm pivot and the hole its pivot arm. For the legs, the green box is more than twice as high, which gave it more leverage and less stress on the pivot.
One problem that arose from that was the pivot developed some play after using it a few times, which allowed the right arm to move beyond the torso and then catch on it (see red asterisk in the step 7 photo).
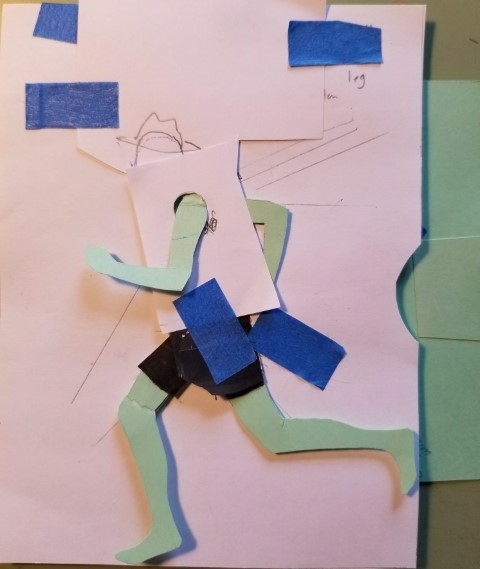
To remedy this I did a “field mod” to the completed card by adding card (white below) that prevented the tab from moving so far left, which kept the arms under the torso.
 Field mod
The figure and base of the card are colored pencils and ink pens. The main background is mostly pastels. The torso makes my butt look big, so maybe I need to work on that a bit. The mouse holding the pink sign is a nod to when I ran my first (and last) marathon. Ma and Pa Wardinkle came out to cheer me on, and a few miles in beside the road, Pa had a 4’ x 8’ piece of pink foam insulation with “Go Howard” written on it in big letters. All I could think of was, “Couldn’t you have used the blue stuff?.”
This card took lots of tinkering and sketches to get it working, and more tinkering to get the final version to work. When I sent it off it was still a bit stiff, but worked. I did use the Silhouette Cameo to cut many of the parts due to all the circles. That was handy when I kept needing more parts to redo the arms over and again.
 Party!
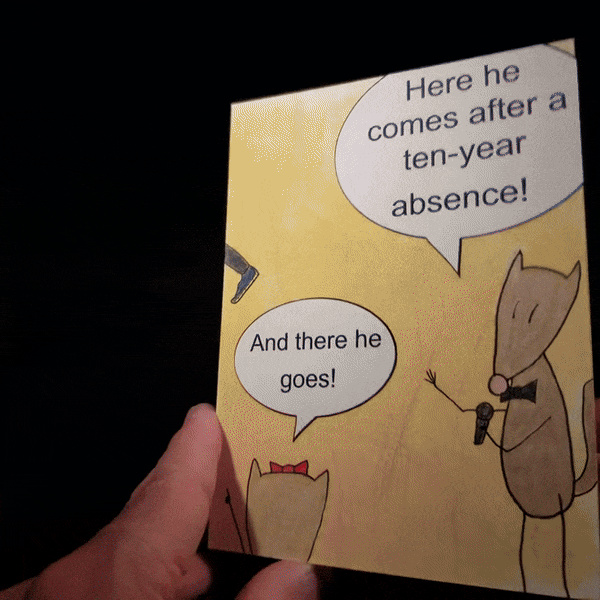
Cover
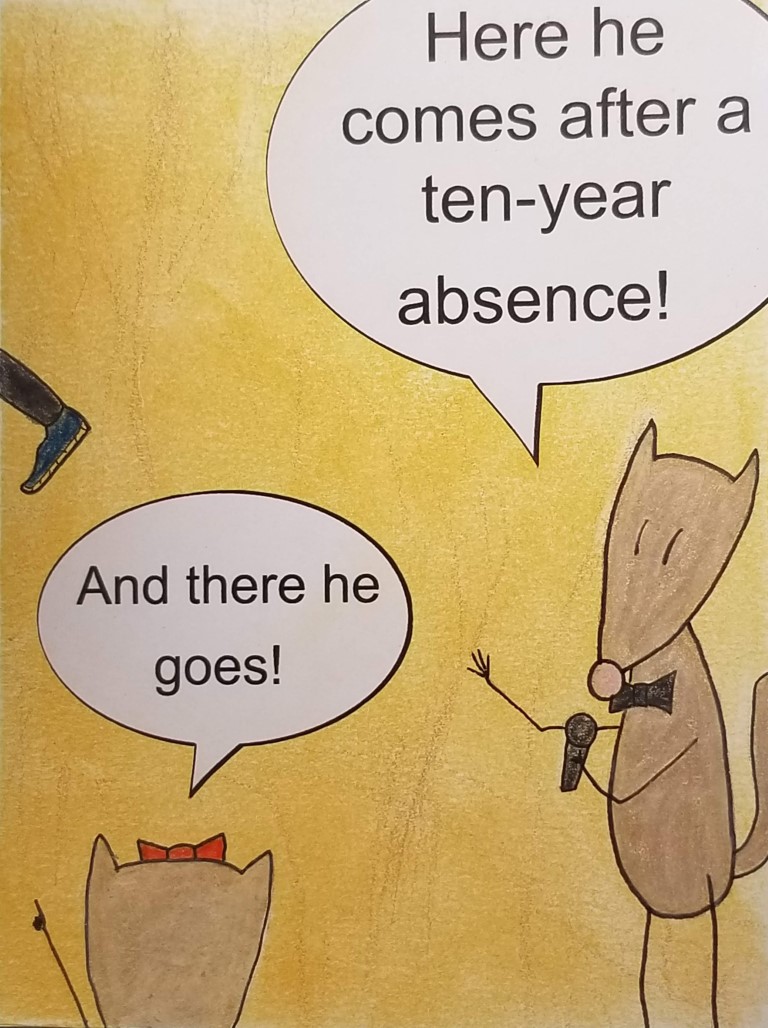
The cover is just some mice watching the race done with pastels, pens, colored pencils, and printed speech balloons. It’s not great, but I did it last, and was running out of time.
Build
- 9” x 6”
- The base was Strathmore 300 Bristol 100lb
- The mechanism was miscellaneous cardstock.
- The mechanism was cut with the Silhouette Cameo, the rest by hand.
-
It is actually a tear-down of it in reverse order. ↩