“Bridge”
Idea
While cleaning out some old boxes from my son’s room, I found a bag of all sorts of cards: Pokemon, baseball, Toontown, Webkinz (remember those?), and a bunch of playing cards. Of the playing cards, there were two complete decks and a mix of other partial decks. In the partial ones, there was a handful with a classical design and I thought, “I can do something with those.”
Mom plays bridge, so the obvious thing to do was build a bridge (I’m so clever) out of the cards. That was easy but very plain. How should I dress up the bridge? Then I heard a little voice say, “Ahem. Mr. Wardinkle? We can take care of this for you.” Once again, the mice came to the rescue!
What would the mice be doing on a bridge? First I thought it’d be a vehicular bridge, but switched to a pedestrian one since that opened up more possibilities. Finally, I came up with four things for the mice to do:
- Fishing off the bridge
- Punting under the bridge
- A family walking up the bridge
- Bicycling mice
Design
I used four playing cards on the inside, two for the bridge and two for the “road.” As usual with pop-ups, I want the biggest pop-up that will fit in the closed card. In this case, the “road” cards would be flush with the outside edge and then the two bridge cards would go between them and since they are the same size as the road, they also fold flush to the outside edge (the parallel fold FS6 mechanism). Easy! The angle of the bridge was dictated by the width of the base, and my standard 4½” wide card gave a nice 40° incline.
Since the cards were plastic-coated, I sanded areas where I glued them to help adhesion. For the two bridge cards, I sanded a strip on each side to glue on rice paper hinges. Rice paper is a thin, strong paper perfect for making hinges or repairing pop-ups.
Adding additional mechanisms to the bridge was a bit tricker. The bridge gave me three new folds: one at the peak, and one on either end. I prototyped arms swinging out from under the bridge, but I couldn’t think of something the mice could do with that mechanism.
The family and cyclists are a variation of the right angle V-fold (FS1) with the difference being that instead of being on a flat surface, the bridge folds only open to 140°, the red lines below.
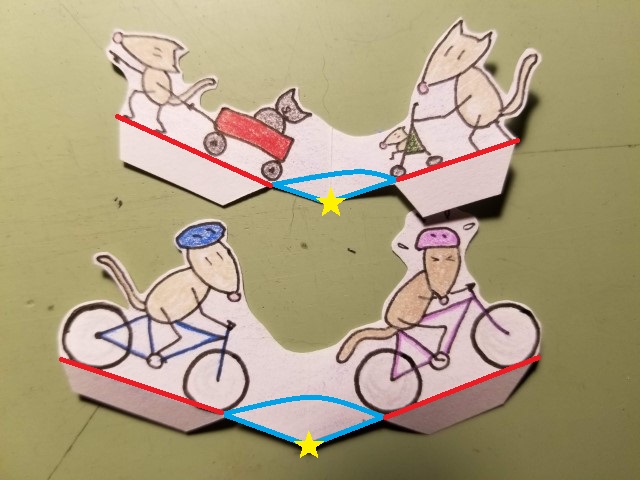
The blue areas were cut out to make it look a bit fancier (BT1). One problem with cutting away the center is that you lose the point that lines up on the base, the yellow star. A trick I use is to temporarily tape the removed piece back onto the mechanism for alignment to the base, then remove it once glued in.
The fisherman and the punter use a technique I haven’t found in any book. It’s like a parallelogram (FS7) but the sides are not parallel. For example, the image below shows the fisherman’s mechanism.
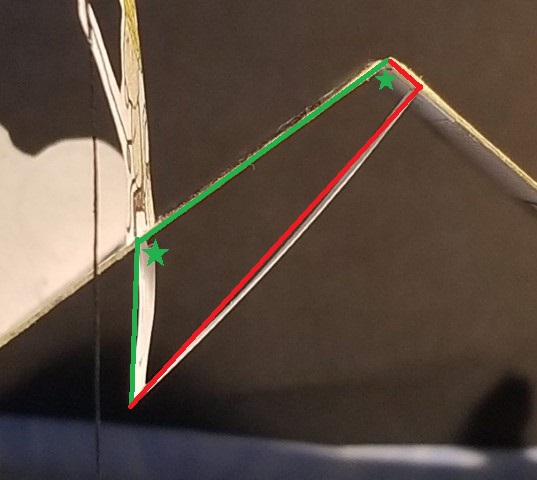
Mathematically, I know two angles and two sides’ lengths (in green). To fold flat, I know that the green sides must add up to the red sides (A+B = C+D). I’ve done this in a few cards, and the only way I’ve found to determine the lengths of the red sides is by making a drawing and trying different lengths until it works1. Then test it with a mock-up.
Here’s the sketch I used for the fisherman. With a ruler and the scale drawn on the short red side, I use trial-and-error to get the missing lengths.
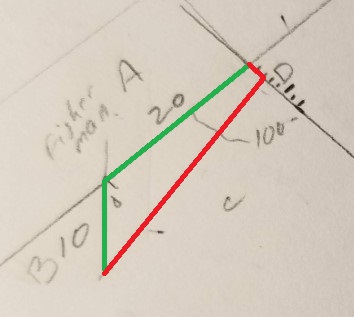
They worked out fine, but if you look closely, the punter’s support curves a bit when it opens, which I think was not getting it glued in the correct location.
Cover
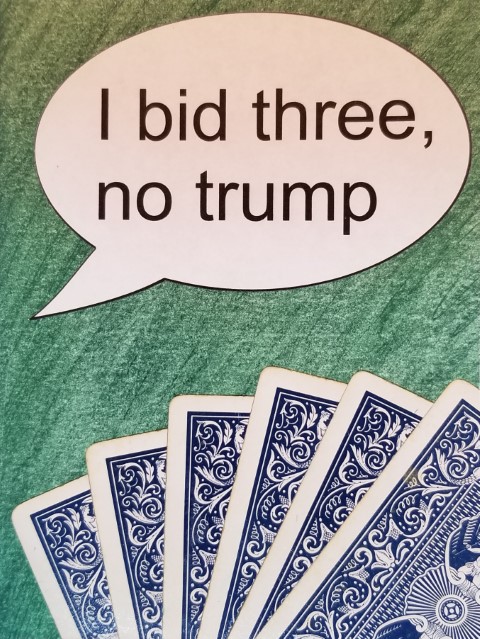
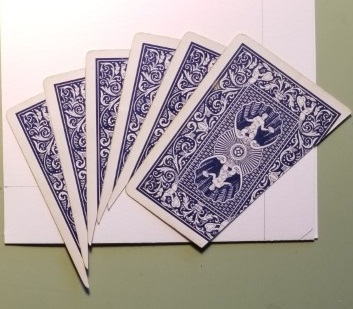
I used the remaining three cards for the cover, cutting a piece from each one to make it look like a hand of six cards. Not only did this double the hand, but it also avoided multiple layers of cards, which would have been much too thick.
The speech bubble was printed out and cut on the Silhouette Cameo, as usual.
Build
- 9” x 6”
- Aside from the speech bubble, everything was cut by hand.
- For strong, thin hinges on the bridge I used rice paper.
- The base is Strathmore 300 Bristol 100lb, with pastel backgrounds and PrismaColor colored pencils for illustrations.
-
If my math was better I may be able to figure it out. I think the opposite corners of the rectangle are the foci of an ellipse and where the ellipse intersects with the short red side is the point I need. ↩