Study in Black and White X
Idea
After three consecutive months of mice, I needed to break the pattern. Study in Black and White IX was in June 2025, so I was due for another one. Trying to come up with a new shape is getting harder and harder. This time I thought of doing the first 90° study. I toyed with ideas like patterns that shifted as you moved the card around. After doing some sketches, I came up with the diamond pattern.
Design
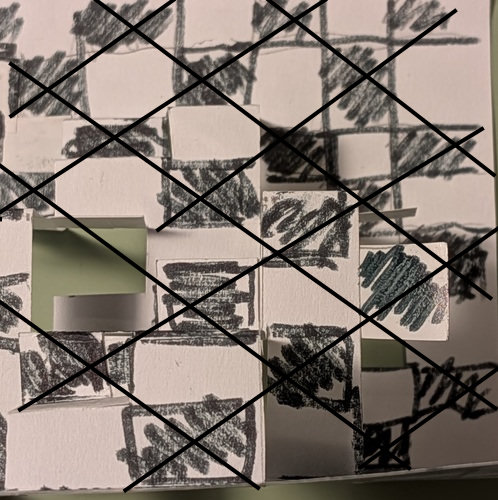
The sketch #1 was a 16x8 grid, as shown below. I’ve already done squares, so if I skewed the squares into diamond shapes, it would be more interesting.
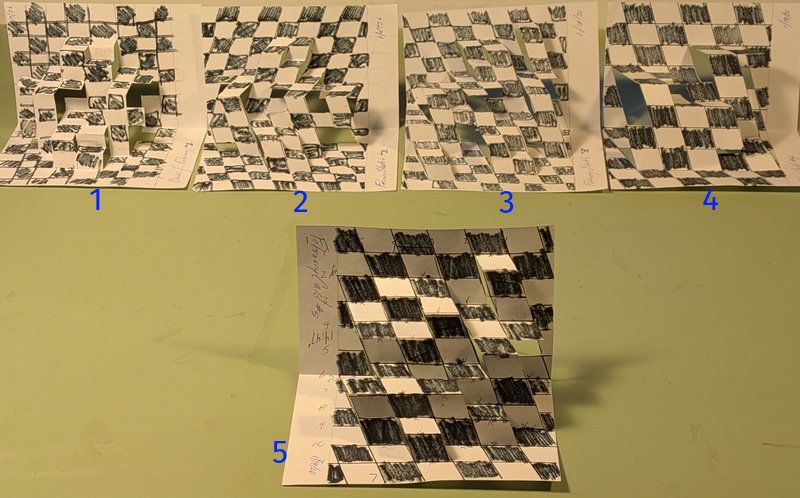 Five sketches with the final in the front
Sketch #2 used the 16x8 grid at an angle, but symmetrical with the angle on the top, the mirror of the bottom. I didn’t like that very much, so #3 has the same angle on the top and bottom. The diamonds seemed too small, making the pop-up busy, so I went with 12x6 in the last two. #5 was a refinement of #4 since it stuck out of the card when closed. (How many times have I said “Don’t do that!”?).
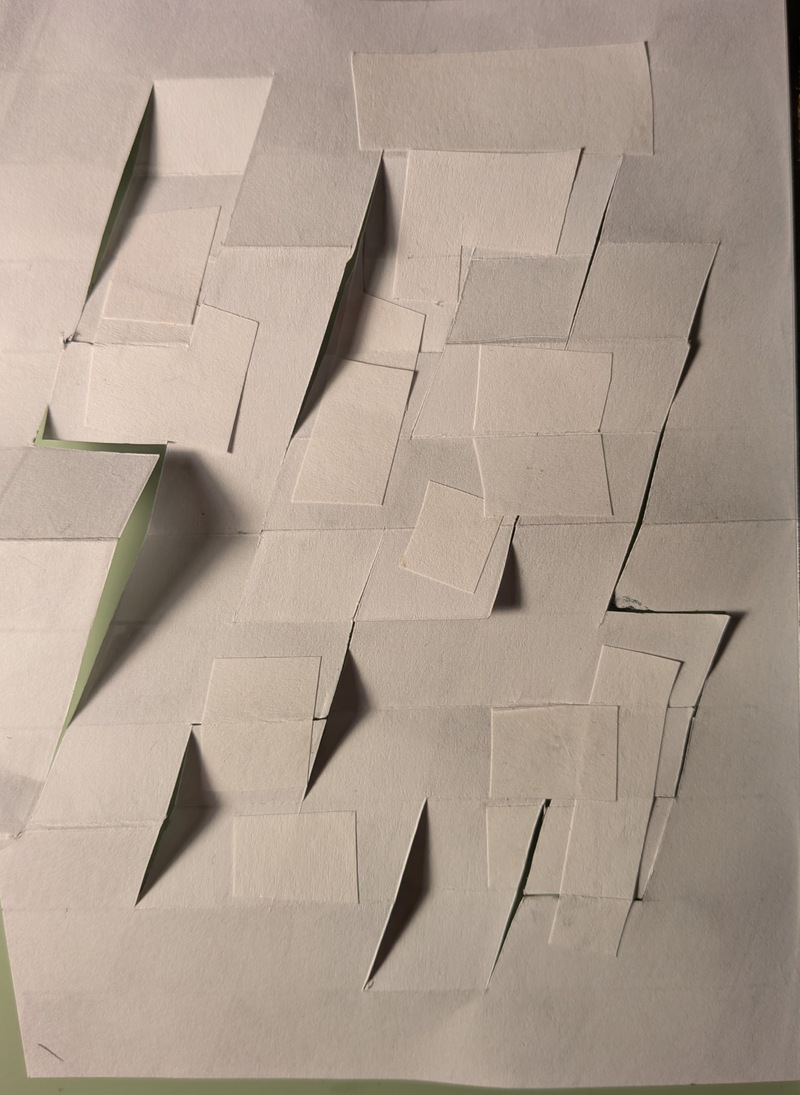
Here you can see the back of the final sketch. All of the additional pieces paper show where I made a cut or fold, then decided to “remove” it.
 Back of final sketch with corrections
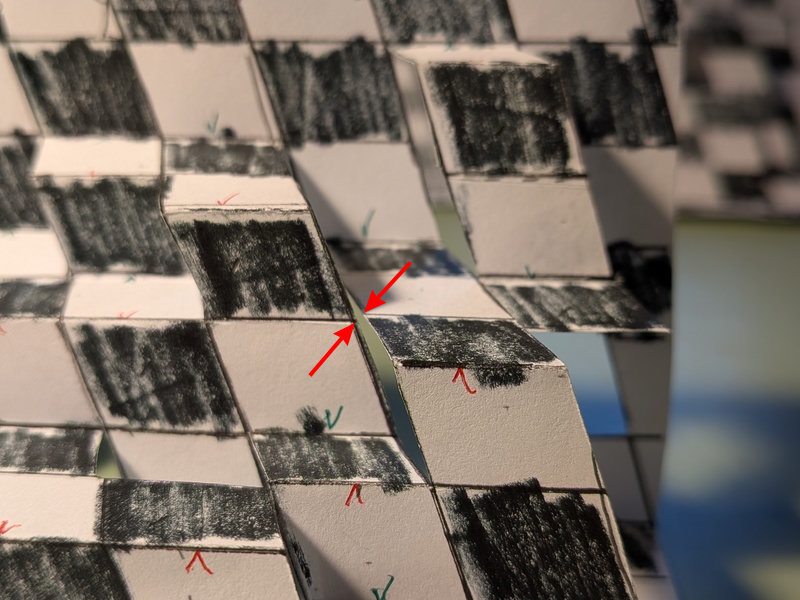
After I printed the final, full-size design, I needed to know where to score and cut. I marked up the final sketch with row and column numbers, and red and green v’s for mountain and valley folds.
 Marked up final to help with cutting
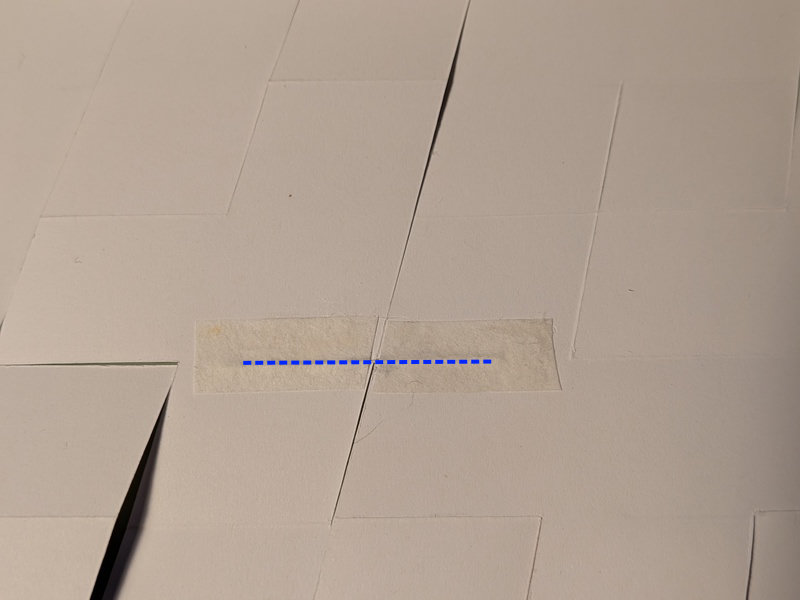
The two arrows indicate where two edges weren’t connected, so tending to float a bit. It’s something that’s not too noticeable, but to fix that in the final version, I glued a piece of thread on the back where those two edges met (blue dashed line, glued under some rice paper).
 Thread to connect edges
And now there is never a gap.
 Floating edges
I couldn’t use the Silhouette Cameo to make the cuts since they needed to be very precise. Looking at the checkerboard patter of the final and trying to correlate the cuts from the sketch were enough to make my eyes cross. As mentioned above, I transferred the column and row numbers from the sketch to the final version (see the 8 below?). Then I could make the scores for the folds in the correct places. To make sure made the cuts the correct length, I put tape on the ruler to mark where I needed to stop cutting. Here I’m cutting three rows.
 Tape as cut guide
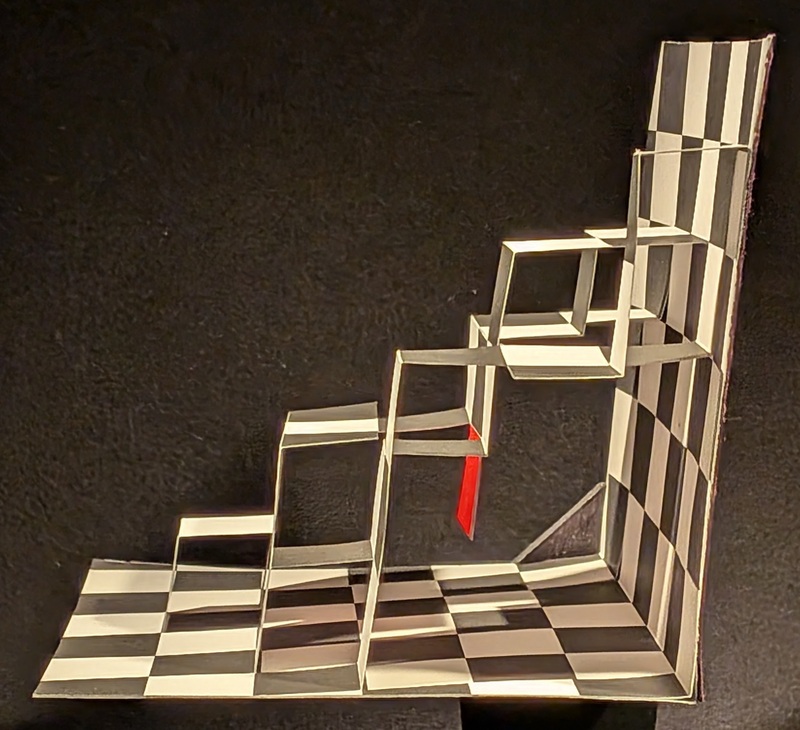
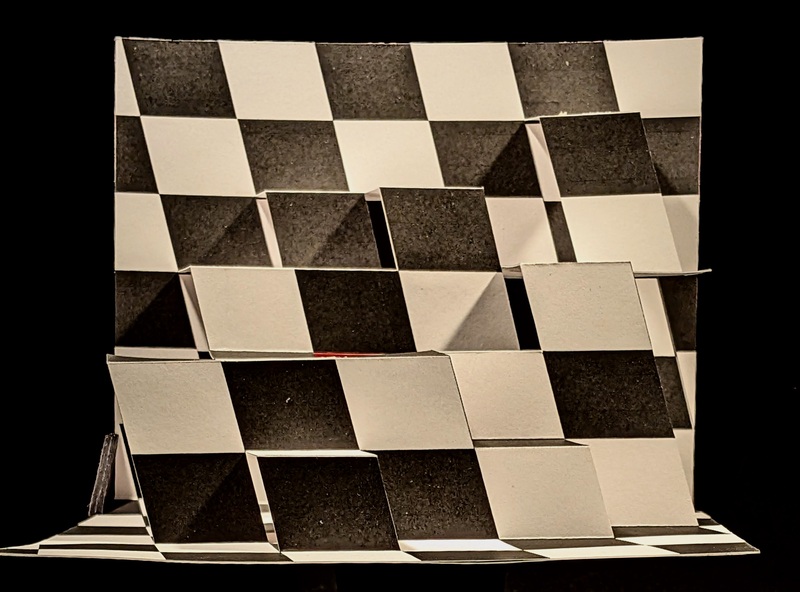
Only the parallelogram mechanism for this card, as it was for the December 2025 card. Here’s the side view of the mechanism.
 Side view of parallelograms
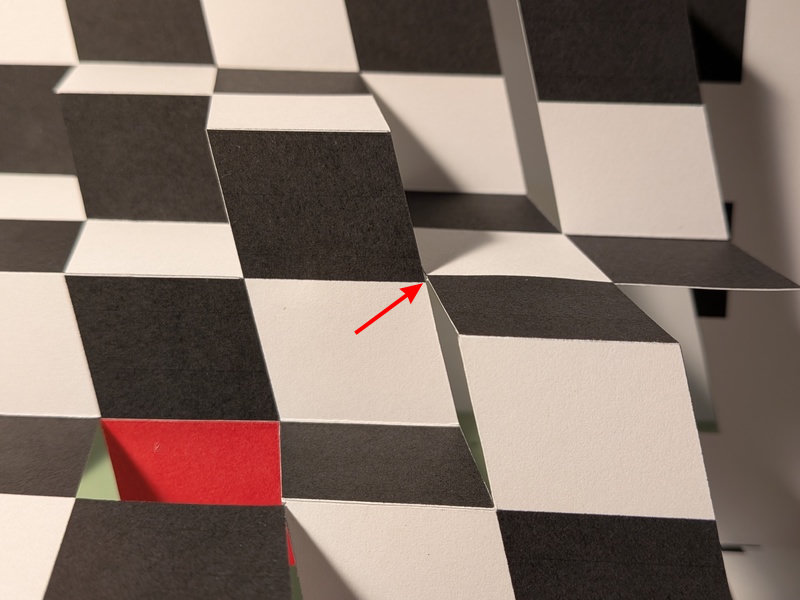
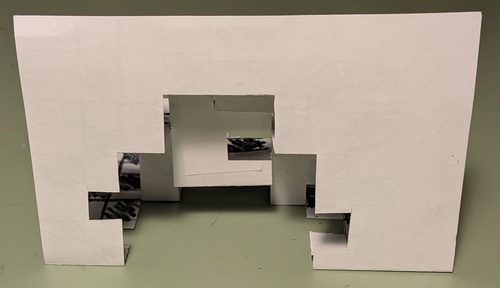
In the photo above, notice that the checkerboard pattern is continuous on the bottom and back of the card. Since the mechanism is cut from one piece of card, the is a big hole in the back as seen in the sketch.
 Back view of sketch
To fill the hole, I printed a duplicate of the checkerboard pattern, and carefully aligned it onto the mechanism during assembly. Since it has two layers, I used the thinner index card.
When making the pattern, I had a choice of making a checkerboard pattern on the base, or adjusting the pattern to look like a checkerboard when you looked either straight on or from the top. I tried the latter in sketch #1. In the photo on the left below is a checkerboard from straight on (the lines help show the grid that’s a bit messy in the sketch). When viewed from the more normal view, you see two black and two white squares adjacent to each other, as show in the red and blue squares.
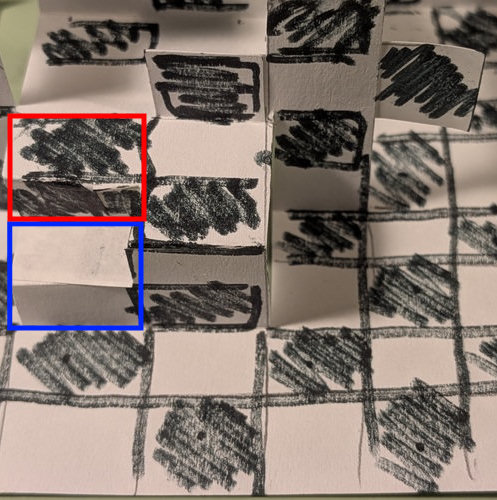 Straight view as grid, and normal view with adjacent colors
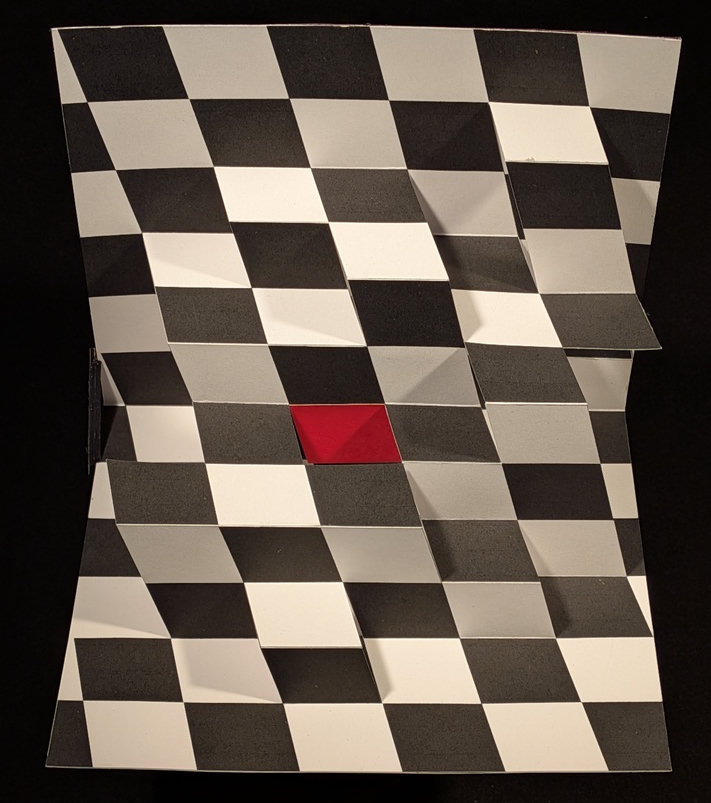
I decided to go with the checkerboard on the base for the final version. When you look at it straight on, the grid is mismatched.
 Straight-on view with mismatched grid
In a more normal viewing angle, the grid matches up nicely and almost looks flat from this angle.
 Front view with matched grid
I tilted the grid to make it diamonds instead of squares, but my brain keep telling me they’re squares in perspective. Even so, I’m calling this Study in Black and White’s shapes diamonds.
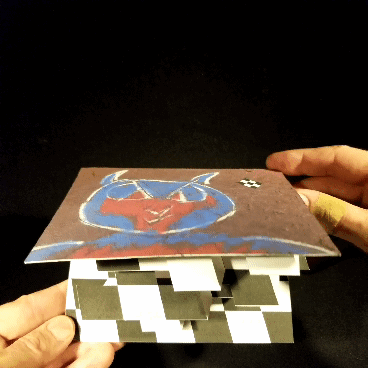
Cover
I’m getting pretty low on Howard Jr’s artwork. Here’s one of the last ones. The holes and tears in the artwork were made by Keebler.
Build
- 150mm x 120mm
- The two layers are made from index paper.
- Everything was designed on the computer, printed, then cut by hand.