Did you hear that?
Idea
While on a recent run, I was thinking about ideas for the September card. Since it was a trail run, I thought about trees, which have been featured in a few previous cards.
| Date | Card |
|---|---|
| October 2013 | Hallmark Halloween centerpiece remake, mentioned here |
| January 2014 | Chatani’s tree mentioned here |
| Christmas 2017 | Christmas tree |
| October 2017 | Spooky tree stump |
| Christmas 2017 | OA winter scene with a tree |
| Christmas 2018 | Christmas tree |
| August 2019 | Disc golf in the woods |
| May 2021 | Copse and Robbers |
| February 2022 | Valentine’s Day “trees” |
| October 2023 | Haunted house and tree |
| October 2024 | A flock of black birds |
| December 2024 | Christmas tree on the December card |
One of Mrs. Wardinkle’s favorite games is the “What?” game. If someone says something, you say “What?” and if they repeat it, you get a point. If the comment was about hearing, you get two points. If the person says “Ha!” before repeating it, no points are awarded. It’s most fun to play with multiple people on a long car ride. The winner gets to choose where to eat (and hopefully not be left behind).
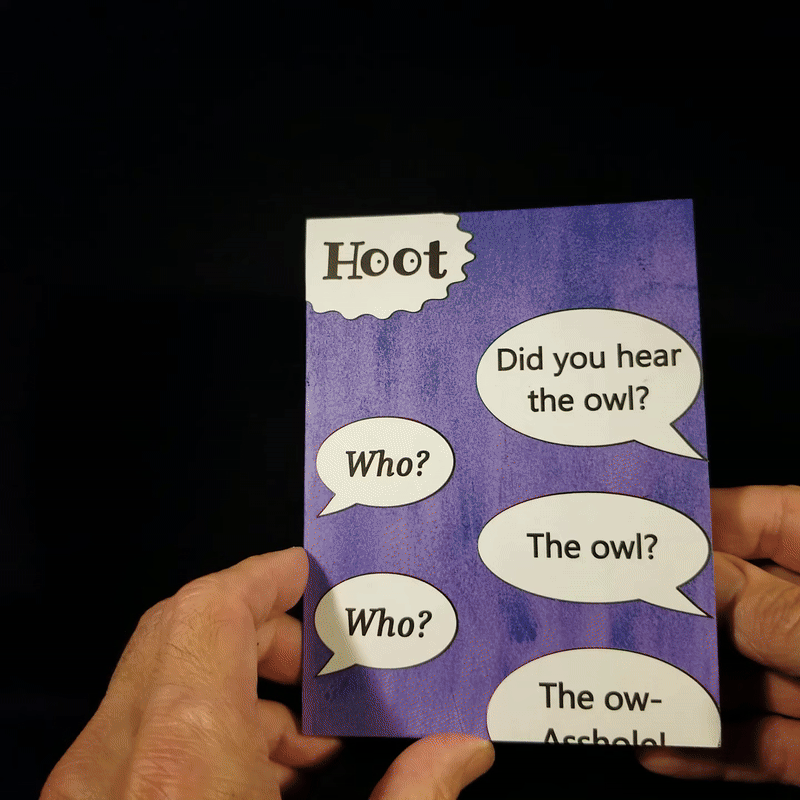
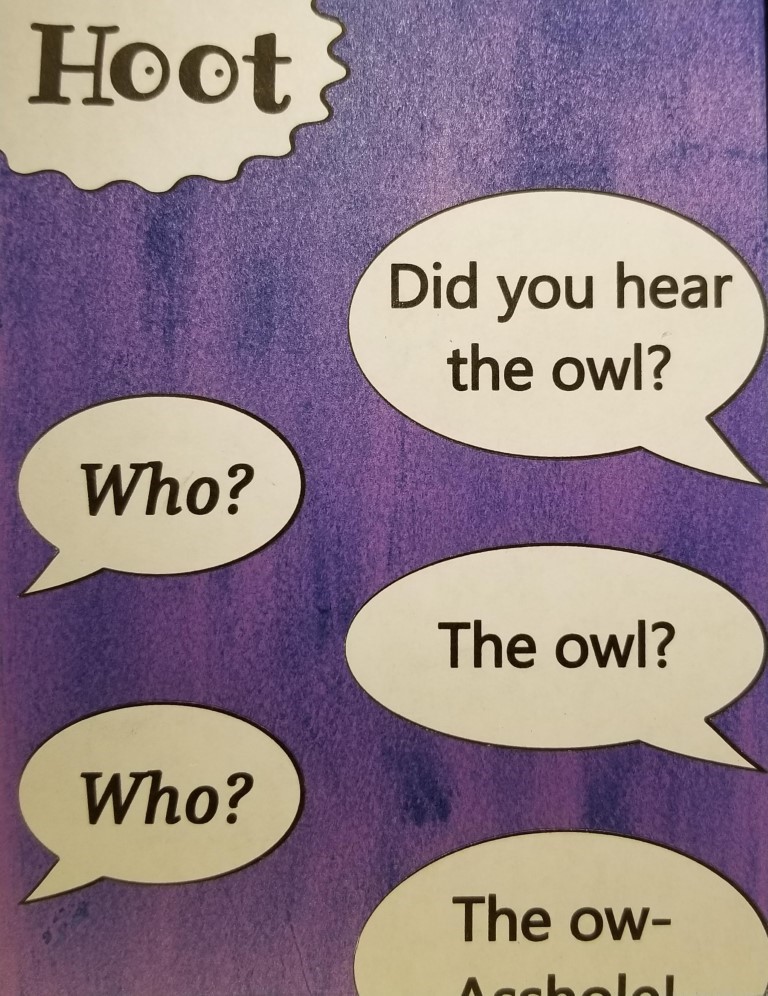
A variation is when Mrs. Wardinkle hears an owl. She’ll often say, “Did you hear the owl?” and I’ll say, “Hoo?” and then we repeat that until she laughs with joy because it is so funny. That’s what I thought of on my run in the woods.
Design
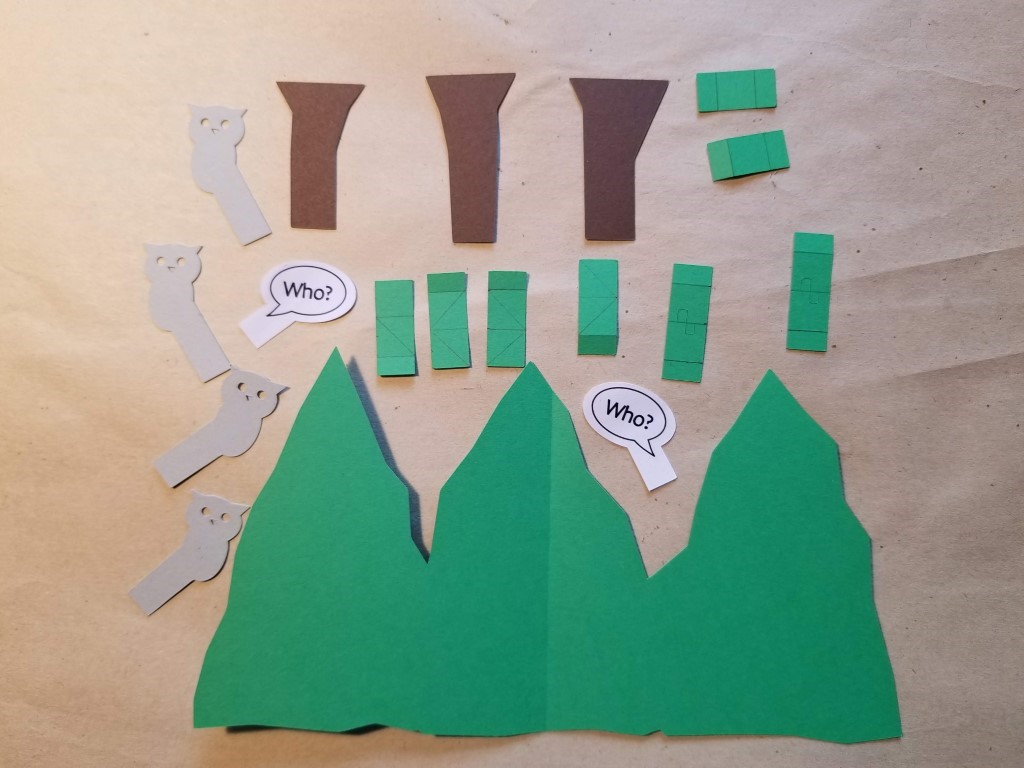
Mrs. Wardinkle was visiting Ma Wardinkle mid-August, and I wanted to get the card done before she left, which tightened up my schedule. For the mechanism, I thought of a 180° card with a floating plane for trees, and then have owls peek out on moving arms. I did a sketch, and it worked out well with three trees and four owls. I made two of them have speech bubbles.
Here are all the pieces cut out and ready to assemble. Most of it could have been cut by hand, but I used the computer mainly to make the supports exactly the same size and cut out the owls. It would have been more elaborate given more time.
 Ready for assembly.
I used Canson paper on the inside, which is a bit lighter than cardstock, but since I planned a layer of cardstock on the outside, that was fine. When I scored it to make folding easier, I cut a bit too deeply, and the fold opened up after handling it a bit. I glued on some rice paper with the idea of matching the color of the finished cover, but I noticed that the fold was opening even more and the cardstock wasn’t sticking to the Canson paper. I believe that was caused by a nearly empty Zig glue stick. So I had to start over this time with two layers of cardstock. This time I used Yes! paste to glue the layers together. Fortunately, I discovered all that before I assembled the whole card.
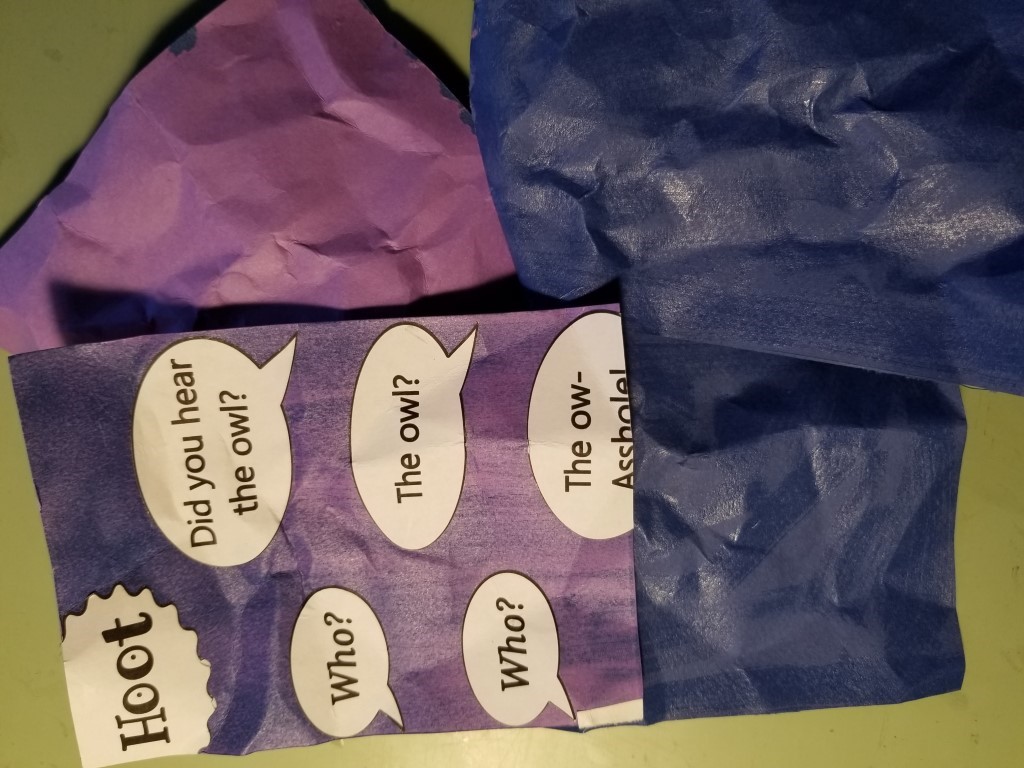 Oops.
Oops.
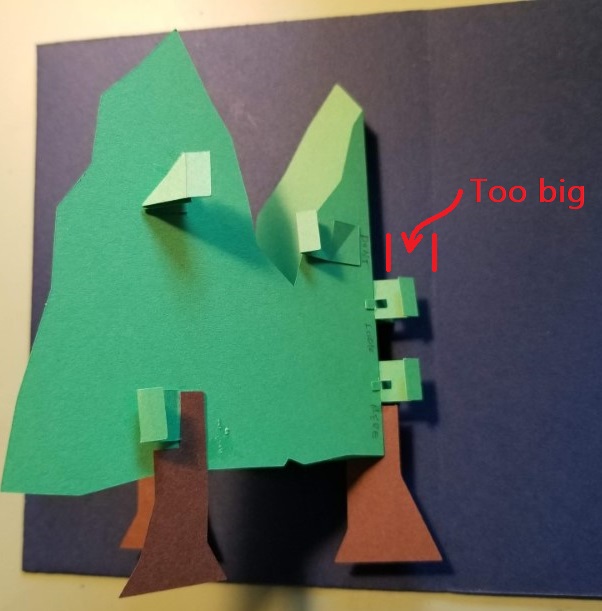
Here, the trees are assembled and ready to attach to the base. There are three types of supports. The two center supports are the critical ones as they set the height for all the others. The other two lower ones are simple supports for the trees. The four in the top row support the tree and have a 45° V to which I would attach the owls.
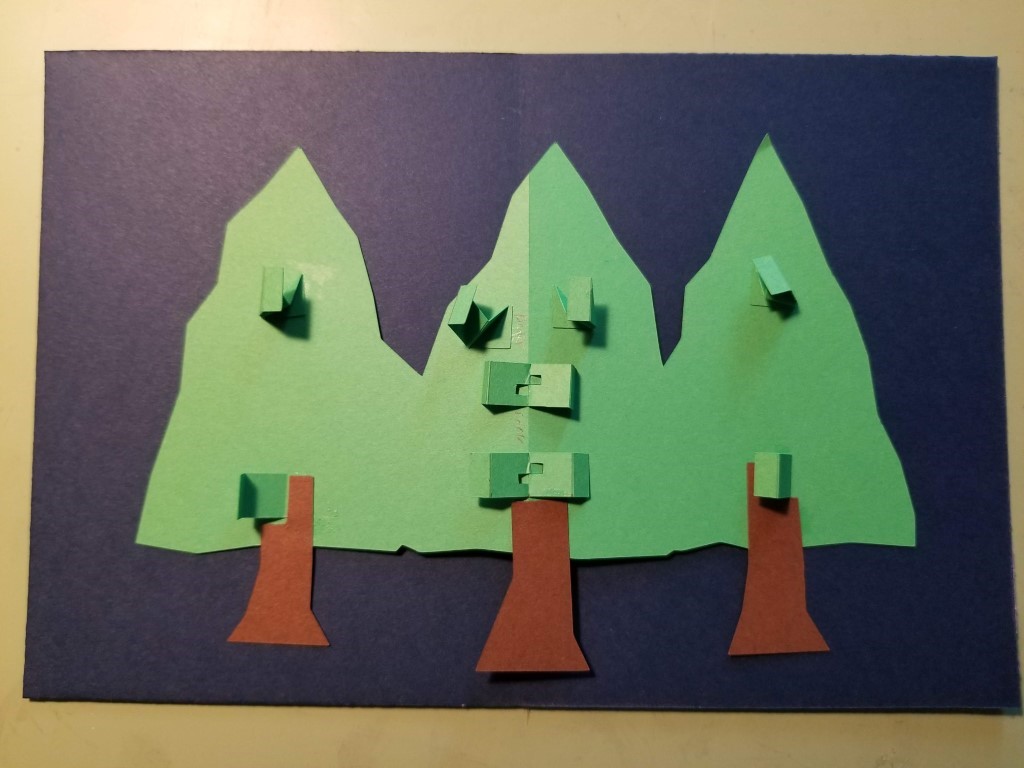 Trees assembled.
First, I attached all the tabs on the left side of the base. Here you can see the tabs a bit better. As the card opens, the triangles in the top supports rotate, revealing the owls hidden behind the trees. The left side tabs are mirrored on the right side, so the owls move clockwise instead of counter-clockwise.
 Left side glued down.
And I made another mistake. After gluing down the right side, I found the card didn’t fully open since I attached the center supports too far from the main fold. (Suddenly, the room seemed to get very warm. 😰) I carefully remove all ten tabs from the base. I thought I might have to redo the trees, but the tabs came off cleanly enough that I could reattach them. 😊 This time, closer to the main fold.
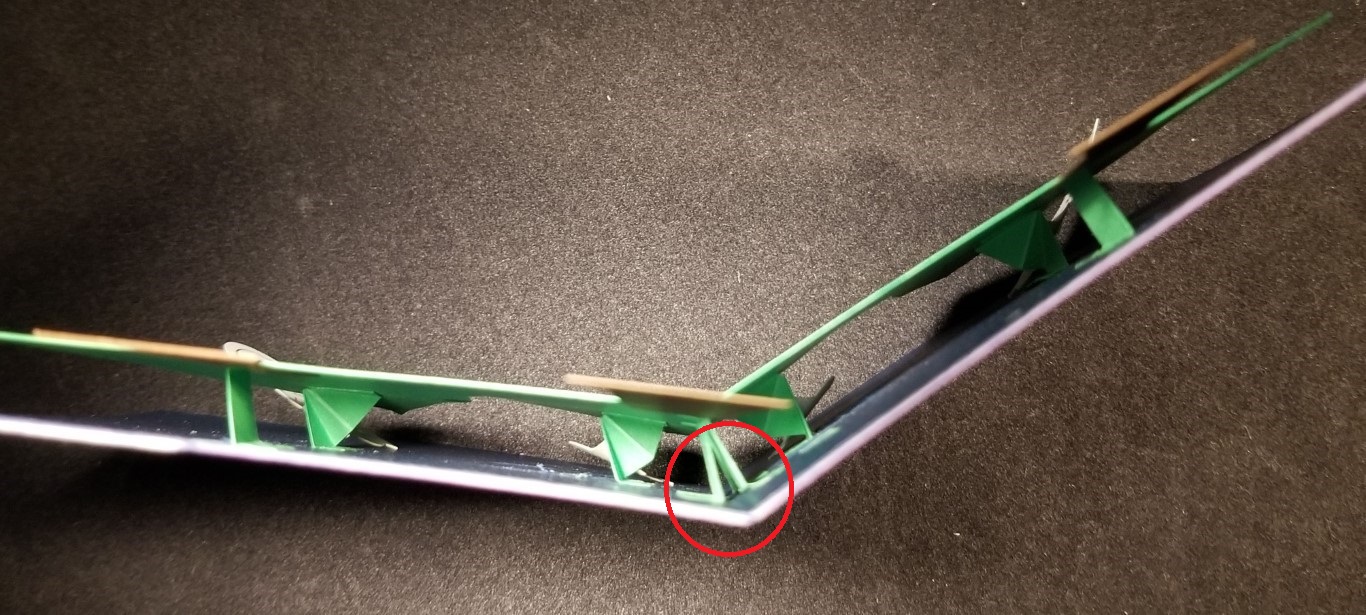 Center tabs closer to the main fold.
Aside from a couple of burps, this card went together pretty well in a short amount of time. I’ve used this style of card before, where I use only colored paper – no drawing or printing (aside from the speech bubbles). It gives it a clean look and is fun to do once in a while.
Cover
The cover’s background is pastels, smudged with my finger. The speech bubbles were printed and cut out by the Silhouette Cameo. When I printed the bubbles, they printed in the location they would be on the card. That way, I had a template of exactly where to put them. Here it is slightly offset so you can see the cover a bit.
 Cover template.
Build
- 9” x 6”
- The base is two layers of Michael’s cardstock.
- The mechanism is on index paper, cut on the computer.