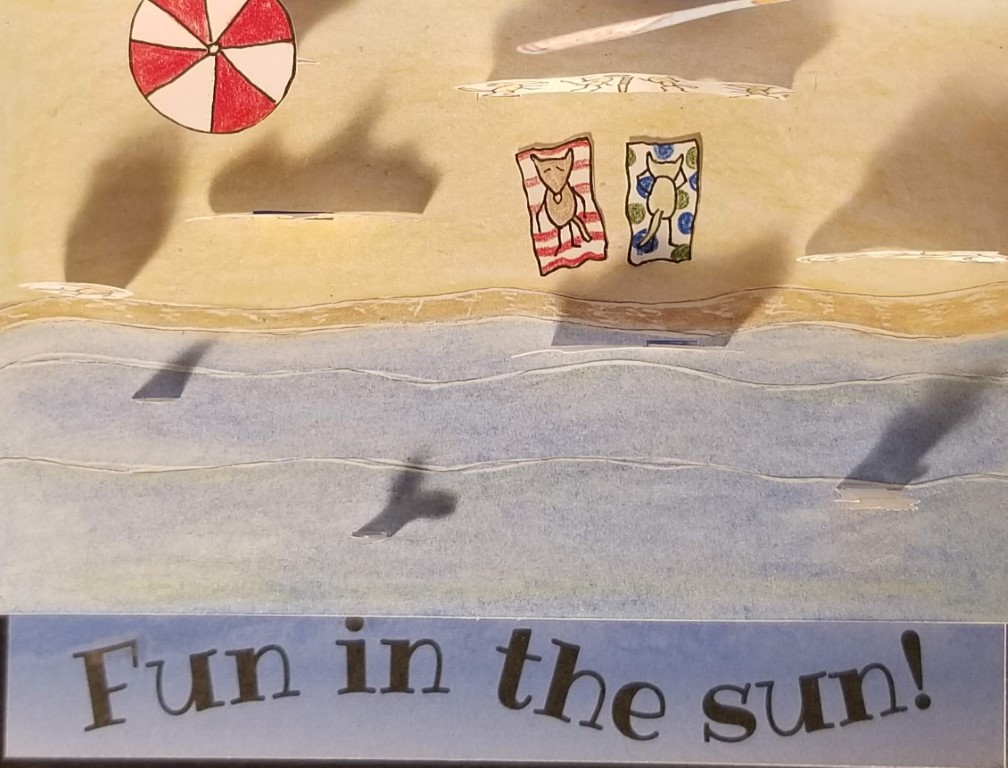
Fun in the sun!
Idea
Looking back, I see that the mice have been featured in July for 2023 and 2024. Why not continue the tradition? So what are they up to this year? They’re going to the beach! That was easy. I thought it’d be fun to not only show the beach but also under the water.
I made a list of things to do at the beach. Some of these overlapped with the 2023 pop-up when they went to the pool. I came up these items that made it into the card:
- Sunbathing
- Splashing in the surf
- Running on the beach
- Building a sandcastle
- Flying a kite
- Volleyball (which they also did in July of 2021)
- Beach umbrella
- Fake shark fin in the water, with a snorkeler underneath
- Submarine (yellow)
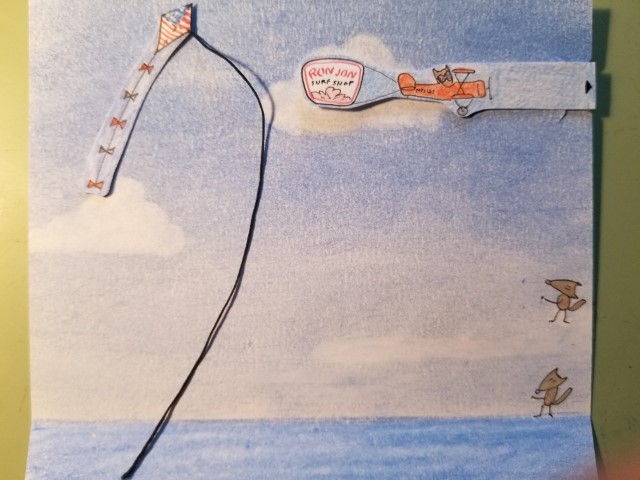
- Airplane pulling a Ron Jon banner
A few on my list didn’t make it:
- Fishing
- Kayaking
- Swimming
And a few got added as the card was being built:
- Riding a bike
- Scuba diver
- Sea turtle
- Whale
- Sunken treasure chest
Design
To make the beach and the undersea world, I needed to make a two-level card. One option was to use a floating plane like the building in the August 2024 card. That would work, but since it’s a 180° card, I wouldn’t get a backdrop for the kite and plane. Another option would be a big V-fold, but the layers have to be tapered to fit inside the card when it closed. I ended up using a parallelogram and a 90° fold. Here’s a sketch of the design:
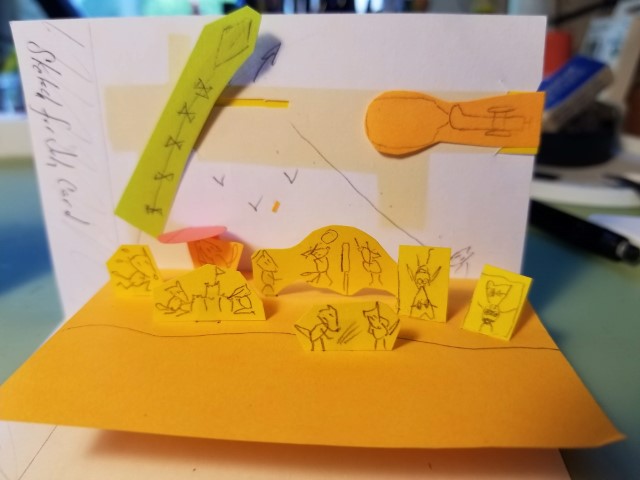 Sketch of the beach.
The platform must be shorter than the card so it won’t stick out when the card closes. The amount it has to be shorter is the same as the depth of the sea. The deeper the sea, the shorter the platform. I had to balance the two measurements and ended up with a 1” depth.
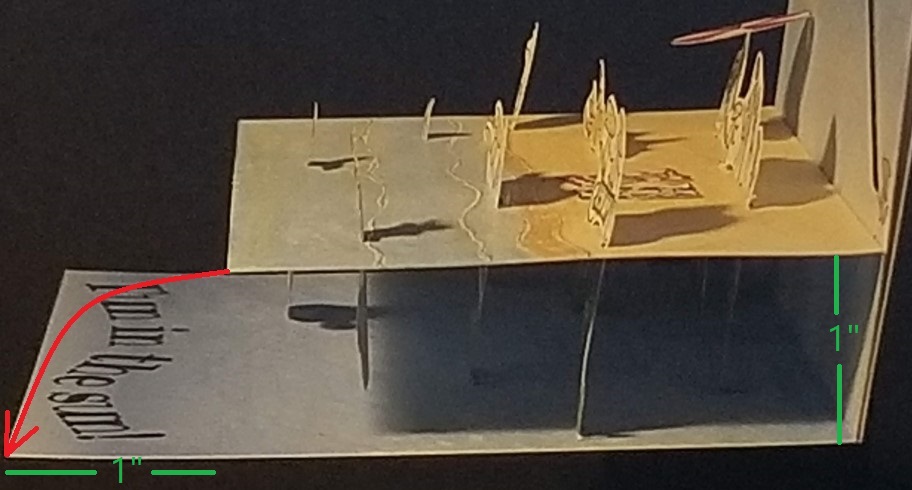 Platform folding down.
To fill the empty space at the front of the card I printed “Fun in the Sun!”
 Top view with beach.
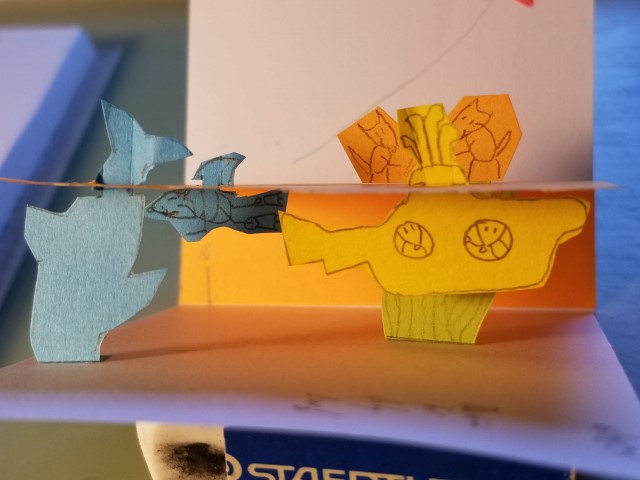
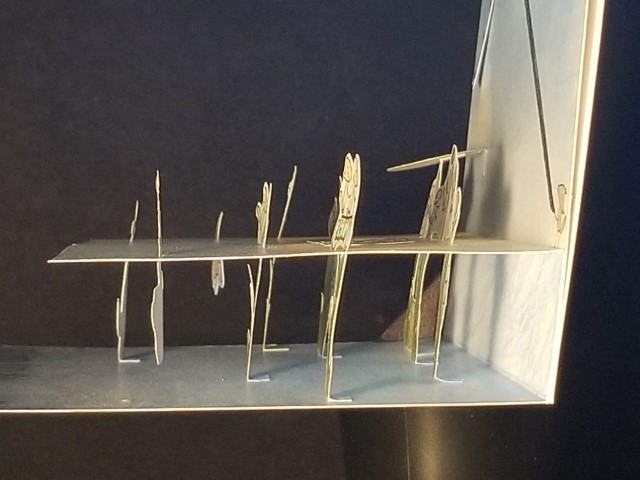
To support the beach, I used the whale near the front and several groups of kelp. In addition to supporting the beach, each kelp sticks up through it to support a mouse. By using a mechanism under the beach for the mice, the top is much cleaner. The submarine and snorkeler don’t attach to the bottom and swing freely. In the sketch below, you can see the blue whale and snorkeler, yellow submarine, and one green kelp behind it.
 Sketch of water.
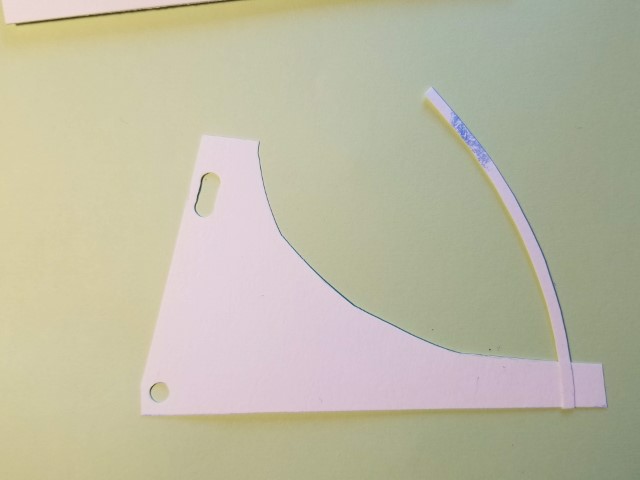
To make it more fun, I thought I’d have the kite and airplane moved by a pull tab. The sketch worked fine, but the full-size one bent the arm when moving the kite. After doing some redesign, I came up with a much better mechanism. Here’s the part that pivots the kite. The hole on the lower left is the pivot point. The slot above is attached to the pull tab. The thin arc is what the kite is attached to. The center of the arc is the pivot point.
 The pivot for the kite.
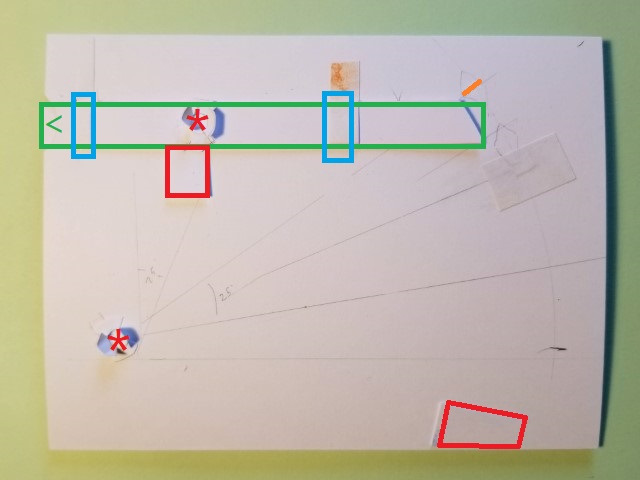
Here’s the mechanism on the back of the cover. The green part is the pull tab, which moves left. The red boxes are the stops that limit the motion of the mechanism. The two blue boxes guide the pull tab. The asterisks are the two points that go through the holes in the pivot. The orange slit is where the arc passes through for the kite.
 The pull tab.
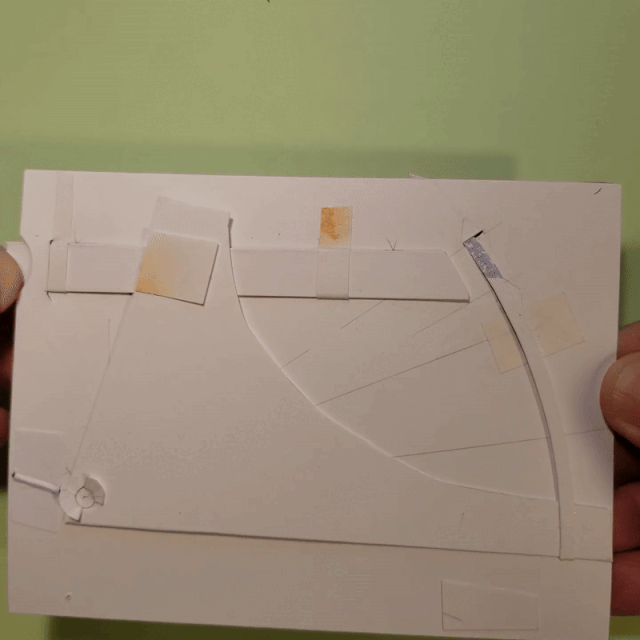
And here it is in action with the kit attached on the other side. The slot is covered by the square piece of paper.
 The movement in action.
The plane is attached to the pull tab, which is a bit of a cheat. I could have had a slot and had it be lower or higher, but there was the danger of colliding with the kite’s elastic string, so I kept it simple.
The rest of the card is simply a bunch of parallelograms, as you can see from the side view below. Each item above has a kelp support that raises it as the card is opened. You can see the submarine and the snorkeler hanging freely from the upper layer. The umbrella tilts down a bit since I open it more that 90° for photographing it. The kite string is elastic thread with the slightest tension on it. The mouse flying the kite isn’t perfectly on the pivot point, so the distance from him to the kite varies a tiny bit, but stays taut. He’s the only mouse drawn on the card itself and not part of a mechanism.
 Side view
I did make a couple of mistakes, which I’ll own up to. First, I cut the slot for the kite in the wrong place, so I had to patch in a piece of card to fix that. Can you see it?
 Oops #1.
The second is when I added the kite-flying mouse. I drew it on the bottom of the card, instead of at the beach level. I had attached the elastic thread and was confused why it got so tight as the tab was pulled, and it was because it was too far from the pivot point. If you ever take it apart, you’ll get a surprise.
 Oops #2.
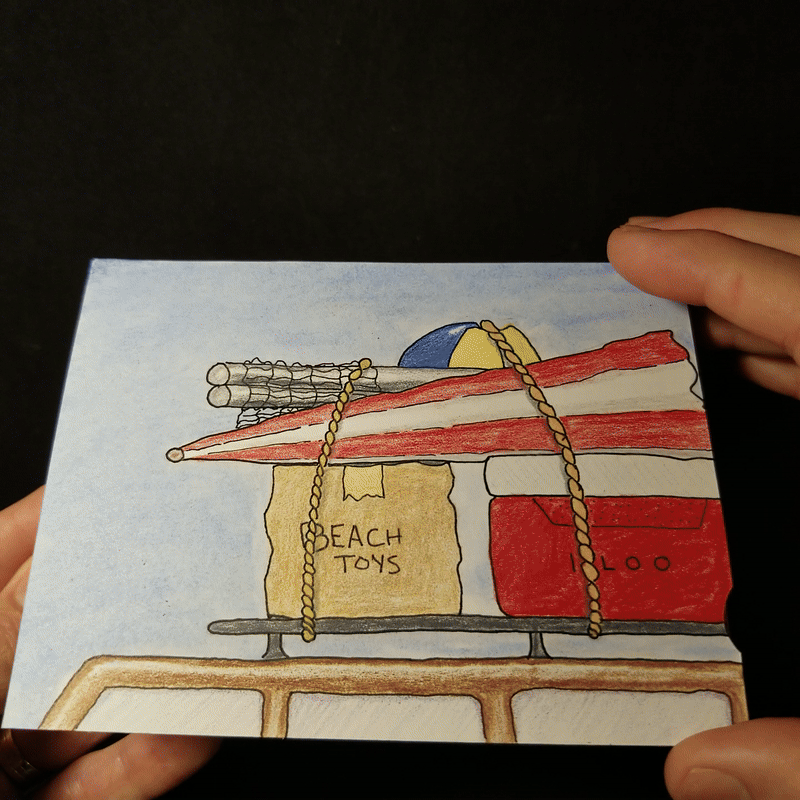
Cover
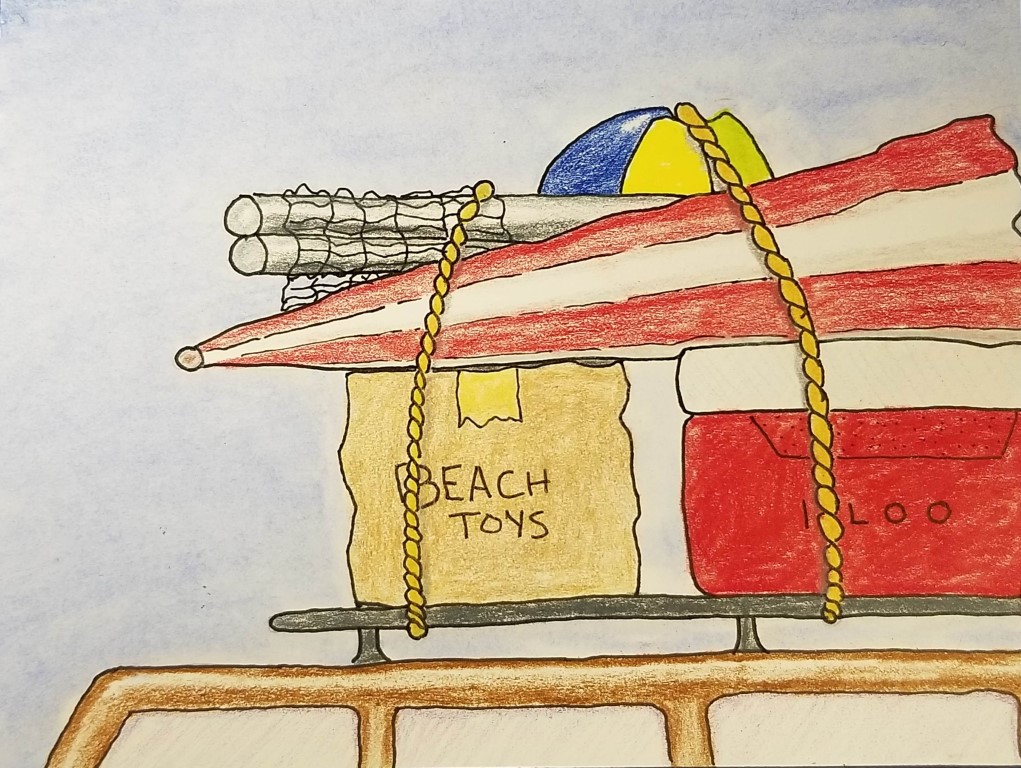
The cover is the family wagon on the way to the beach. The car is a remembrance of a brown Rambler station wagon my grandfather owned, on which I learned how to drive a stick shift (before I was of age). The clutch was so soft, I think it was made of marshmallows.
Build
- 9” x 6”
- The base is Strathmore 300 Bristol 100lb.
- The mechanism is on index paper.
- Everything was drawn and cut by hand.
- I used pastels for the sky, and colored pencils for the rest.