Study in B&W VIII
Idea
I was working on an idea for this month’s card, but decided it would be a better October card. I shifted gears looked at my list of ideas and poked at some possible studies in black and white patterns. Cubes have yet to appear in the series, so I settled on that.
Design
All the studies in B&W are 180° pop-ups. For cubes, there are two options, one with the sides parallel to the main fold, and another using a 45° V fold. I thought by using the former I could use the folds on either side of the center cube to lift smaller cubes. But that didn’t work since the sides of the cube make 90° angles, not the 180° needed to raise a cube. After experimenting, I found I could use the strap technique to create additional 180° folds.
Next, I had to create a pattern to use on the cubes. I first tried having the largest cube have larger squares with smaller ones on the smaller cubes, but that looked awkward. Using the same size squares on all the cubes worked better. That way if you get far enough away, and get at juuust the right angle, the squares on the cubes will line up. Here’s the top view with the squares nearly lining up.
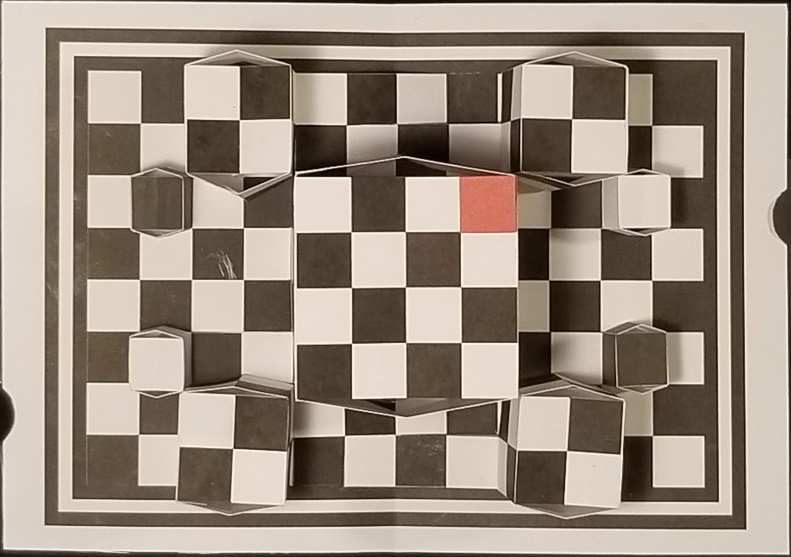 Top
Top
And the side view, too.
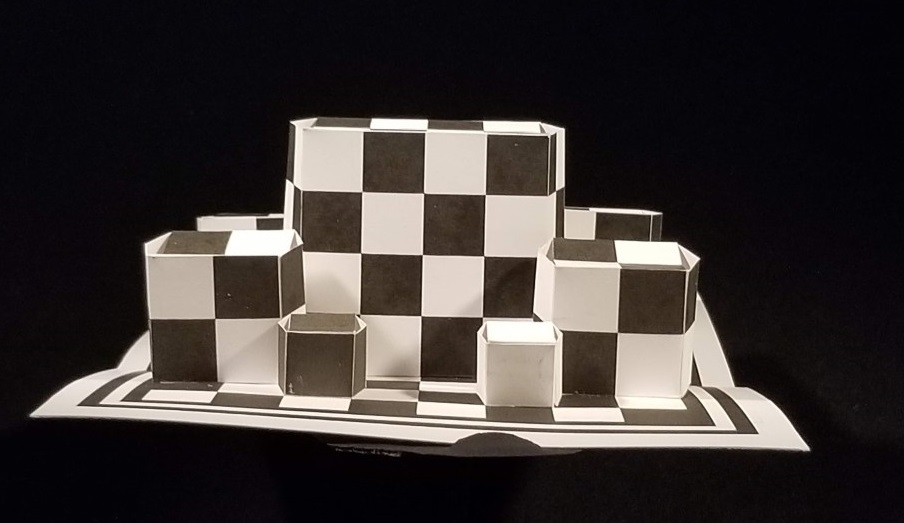 Side
Side
Each cube is the same mechanism of a box with a lid that is pushed up by a support in the middle. The smaller boxes’ “main” fold is on a strap. The photo below shows the card is partially closed. The red line is the strap for the medium cube on the right. The green line, which is partially hidden, is the strap for the smallest cube on the left. Blue indicates where the straps are glued to the card. As the card is opened, the straps flatten out and the cubes rise. The orange lines are center supports that lift the top up, and the top.
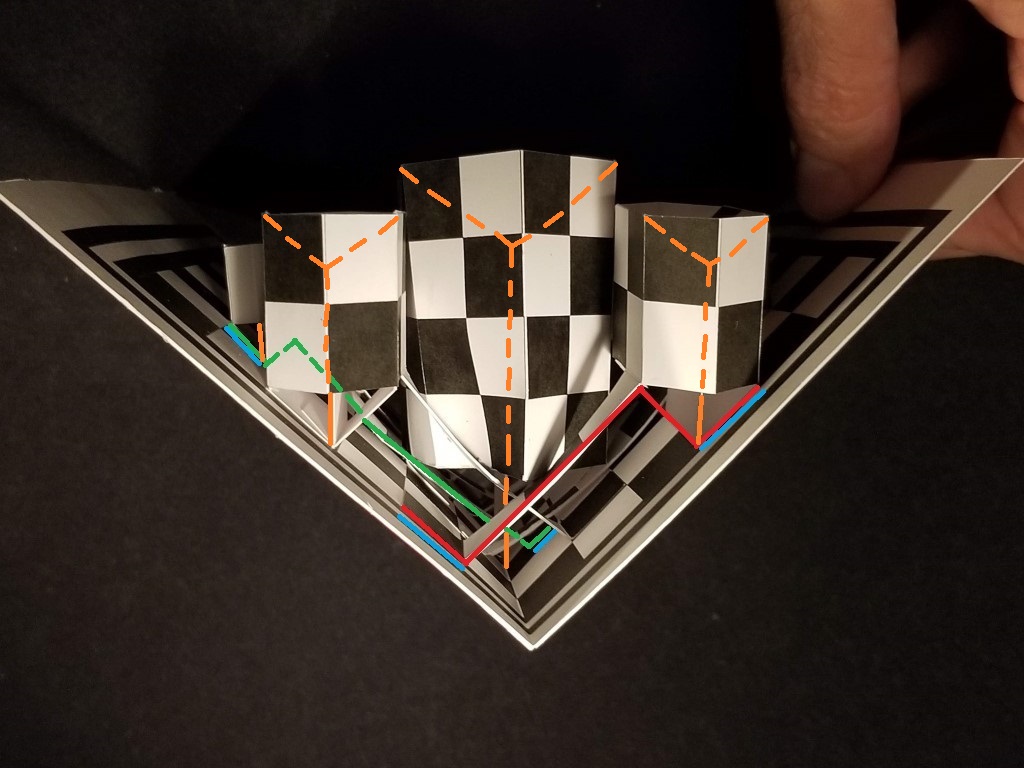 Straps pull up the smaller cubes
The largest cube is on the main fold and has its support in the middle of the card. I had to triple up the center support since the index paper would bend and not push up the lid.
When doing the sketch, I scored (partially cut) all the folds with an Xacto blade, since that makes the crispest folds. However, I found that the folds at the bases of the cubes had too much stress and the scored folder would start to separate as shown below. In the final card instead of scoring, I creased those folds.
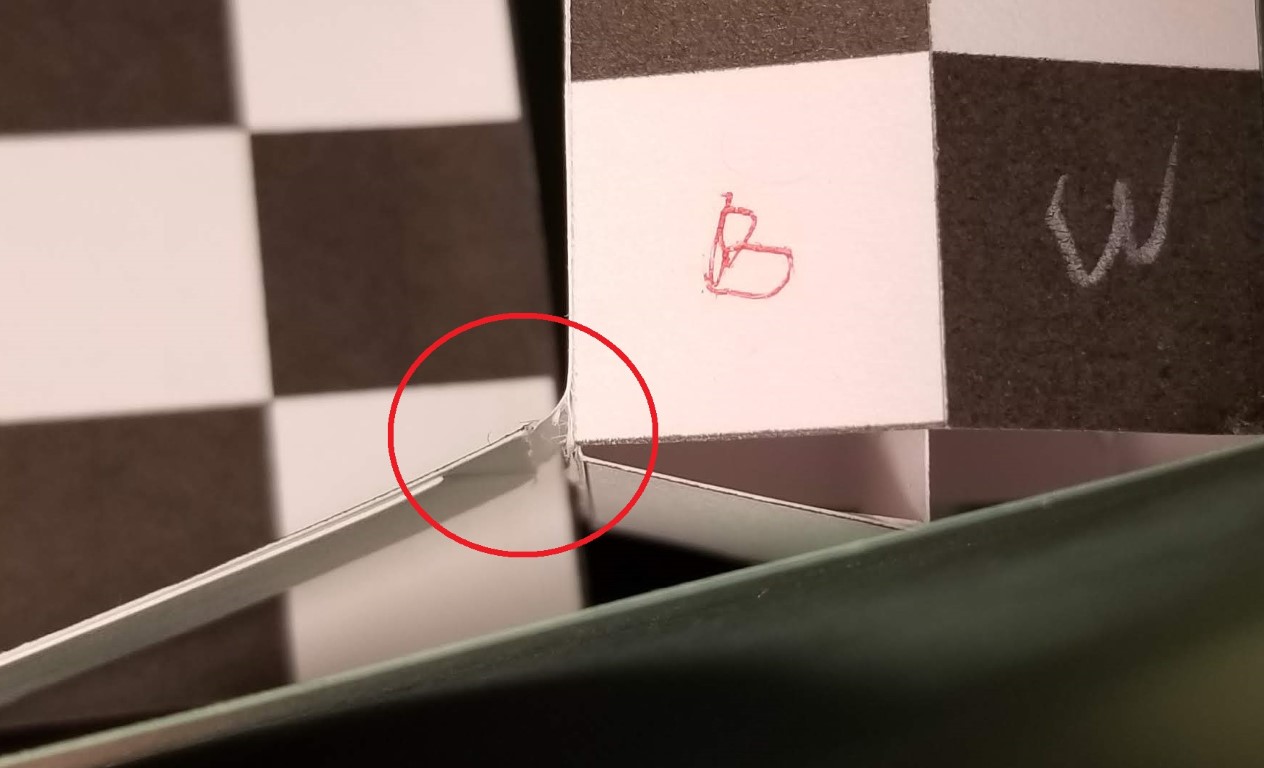 Scoring this fold tears when stressed.
The base has a checkered pattern with a border around the outside. The border is required since the medium cubes, which are on the edges, project their front and back sides as the card closes. If they were on the edge of the card they would stick out half the cube’s width. With the border, they don’t stick out.
I printed out the base, finished the cover, assembled all the cubes, and attached the four smallest ones. When I went to put on the other cubes, I realized that the patterns on them didn’t match the base. I printed the base with the opposite pattern of my sketch, which I used to design all the cubes. I reprinted and re-assembled the five larger cubes. (The smallest cubes worked since they have alternating patterns.) I had a few other “oops,” such as cutting where a fold should be. If you need any checkered cubes, I have plenty in stock.
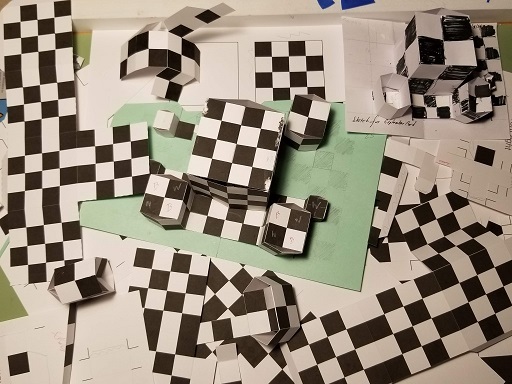 Two sketches, and a bunch of oops!
To assemble the card, I worked outside in. Alignment was tricky, and not perfect. Another issue, which I’ve always run into using cubes, is that the front and back sides don’t open up flat against the cube. I need to do some experimenting to see if I can fix that. All that said, I think the card turned out well. An art instructor told me that to be a “series” you had to have five of them. Does that mean I’m into a second series of B&W cards?
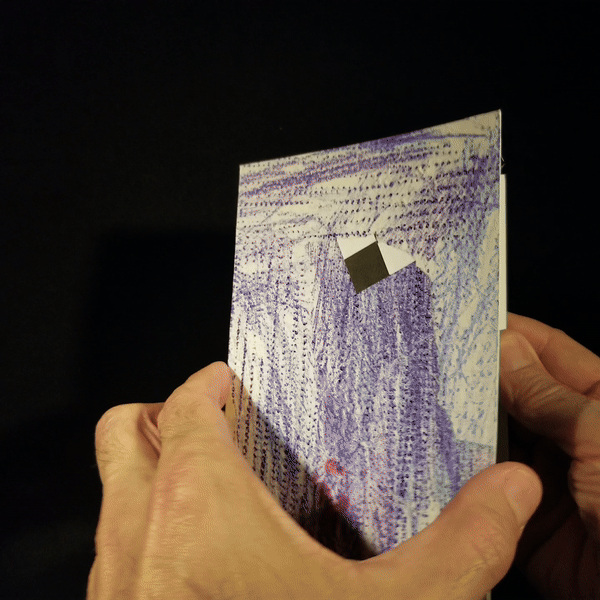
Cover
The cover is one of the few remaining pieces of young Howard’s preschool artwork. In this case, I even had to use two pieces.
Build
- 9” x 6”
- The base is Strathmore 300 Bristol 100lb with a printed background.
- The mechanism is on printed index paper.