A zero-degree pop-up for the holidays
Idea
Every year since 2012 I make a dozen pop-up Christmas cards for friends and family. I do enjoy making pop-ups, but for making twelve identical ones, I try to make it fairly simple to build and optimize materials. I have done cards that required hand cutting and coloring, but usually opt for robots1, and colored paper.
There are only so many topics for a Christmas card. I’ve done a fireplace, Santas, elves, Christmas trees, and snowmen. In 2017 I did a 90° winter scene, so I thought I’d take another pass at that topic.
Design
I used a 0° “pop-up” card design. I first saw this technique in Keiko Nakazawa’s book Best Greeting Cards. I like this technique since it’s simple and elegant, but requires some clever planning to get it to look good.
The technique uses two pieces of colored paper that are cut, folded in half, then put together so they alternate overlapping layers to create the design. In addition to the design on the front of the card, some pieces are folded backwards to make a design on the back of the card as well.
To design a 0° card, draw a rectangle in the shape of your card and draw three or four lines across it to create shapes. Color in every other area of the card to get an idea of what it will look like when completed. Usually using a dark and light color works well.
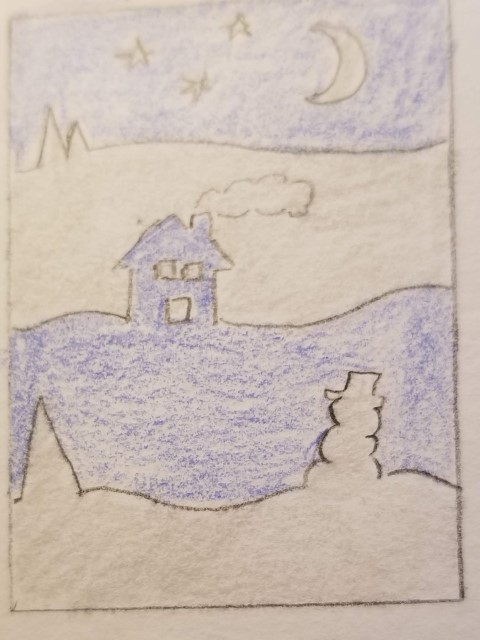
After doing some sketching, I made three small-scale prototypes. As the layers opened, I wanted it to reveal “Merry Christmas” then “from” then “Seekatar” from top to bottom, but the way the layers ended up, the trees, snowman and house shapes would be made from negative instead of positive space, as shown below.
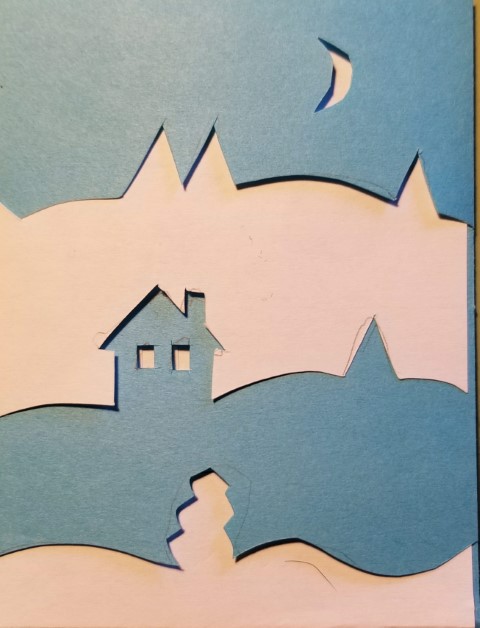
Going bottom up ended up looking better, but the message is revealed bottom to top, which I can live with for the sake of a better looking card.
Then to the computer to design the full-size card. This took another three tries, mainly to move the house and stars around to get it to look better. I added smoke to the house, but instead of making it part of the house, I cut I out of the layer behind to use that negative space for the smoke, separating it from the chimney.
One mistake I made was to not cut the entire card, including the outer edge, from a sheet of paper. I used 19.5” x 25.5” paper and cut five 8.5” x 11” pieces out of it so I could cut two cards from each sheet. Since I didn’t cut the outer edge of the card (to maximize the size), there was some variance in where the center of the card was due to me placing the card on the mat and feeding it into the machine imperfectly. In hindsight, I should have bought more paper and cut on pieces large enough to cut the outer edge so every card would be exactly the same. This also made assembly a bit more tedious, since the smoke on the white layer had to line up just right with the house in the blue layer.
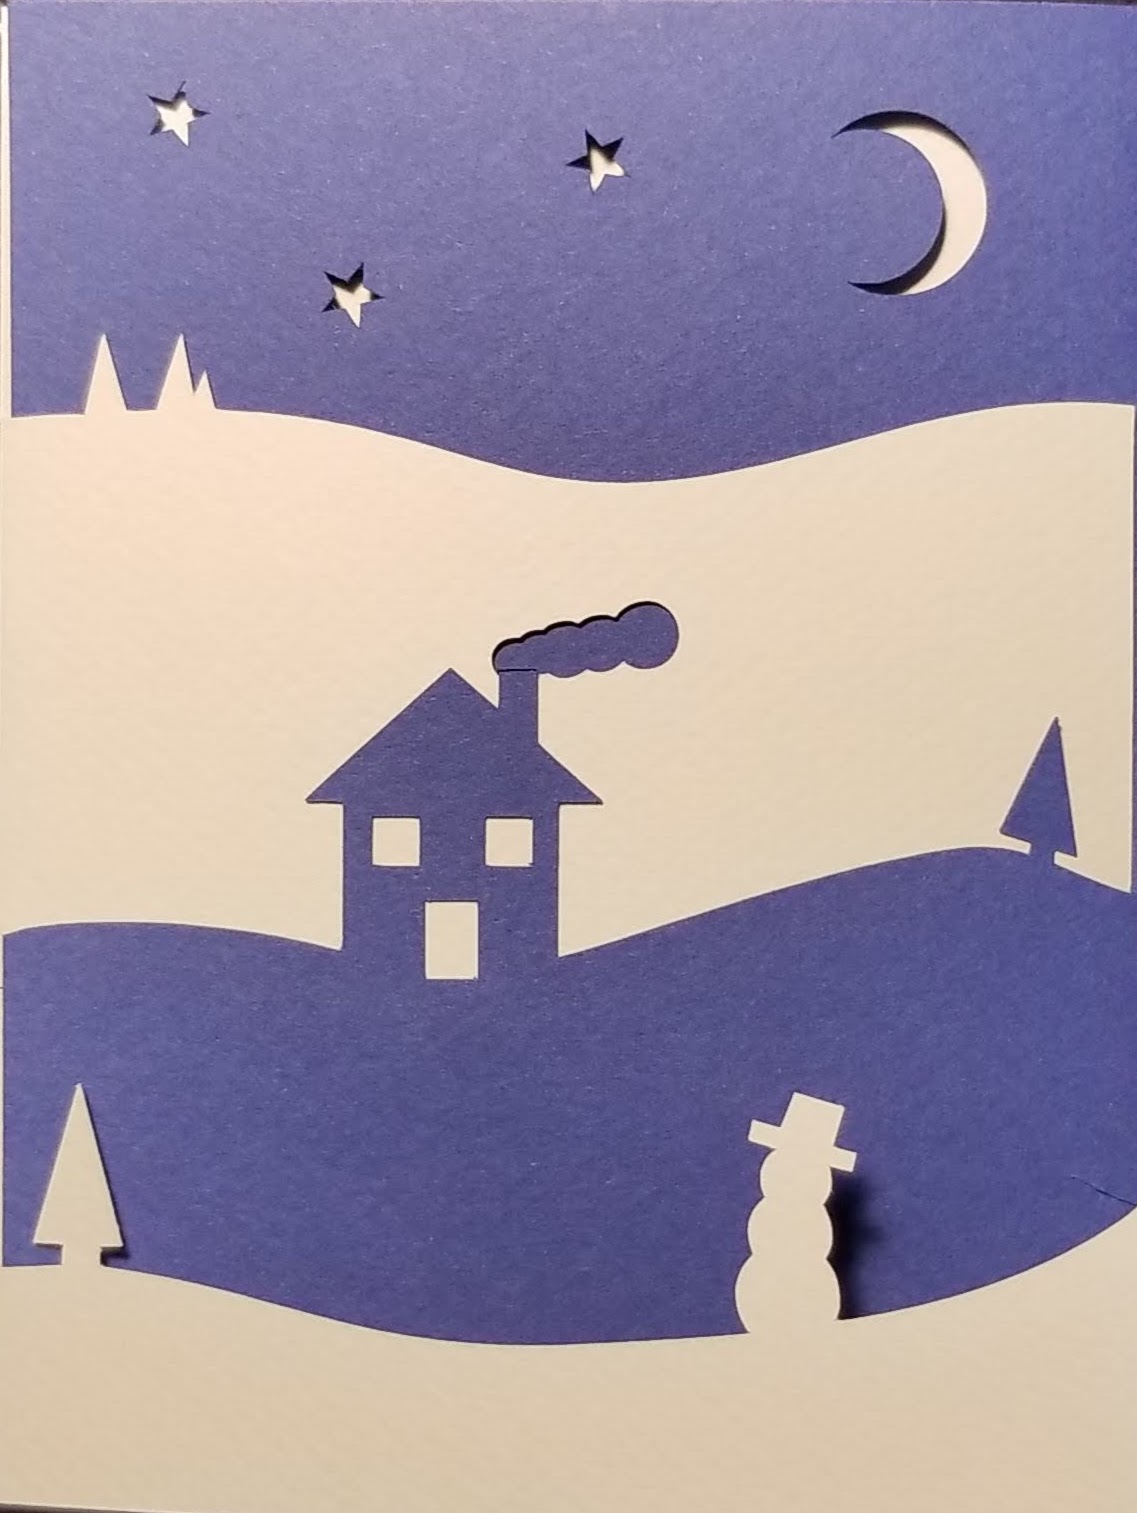
In this card I use pearl and blue paper. There are four layers to open from bottom to top, as shown in the sequence below.
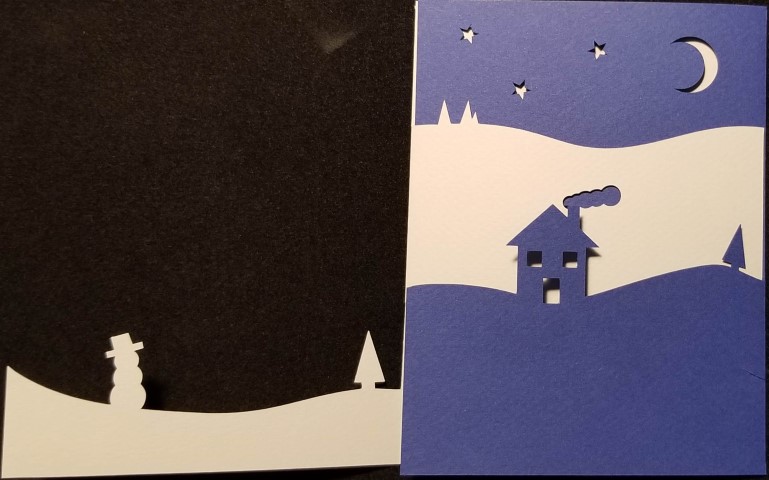
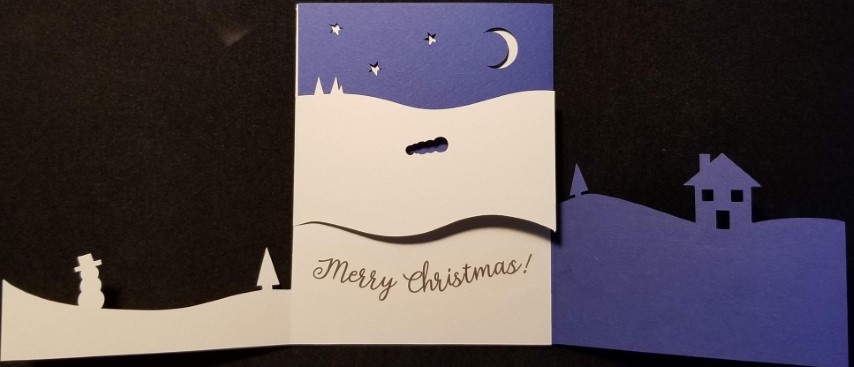
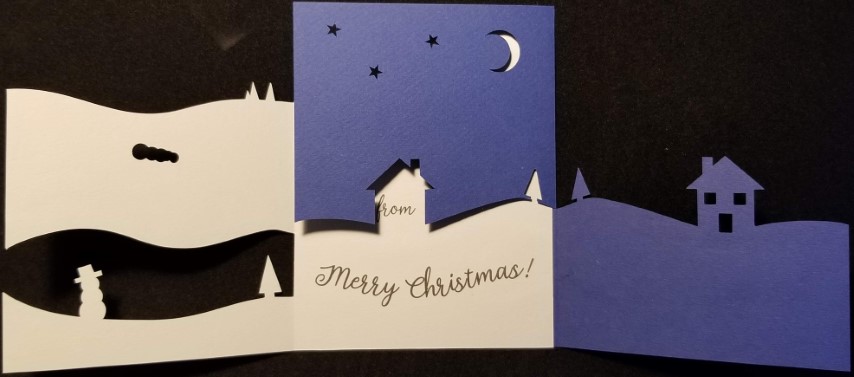
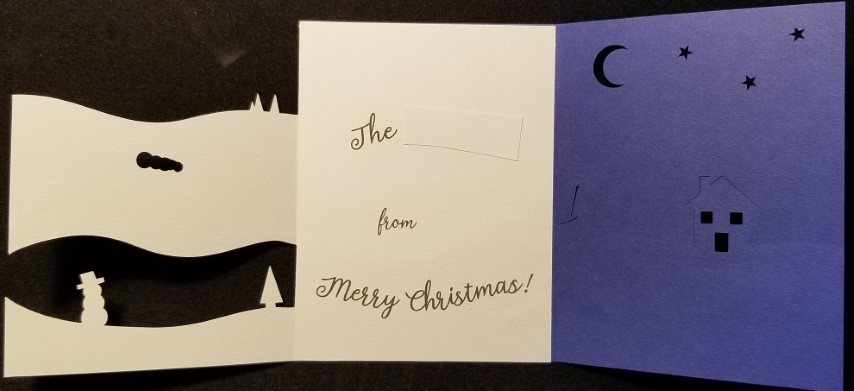
You may notice that when opened, the blue side is the full rectangle, but the pearl side is missing two sections. These have been folded behind to make a design on the back.
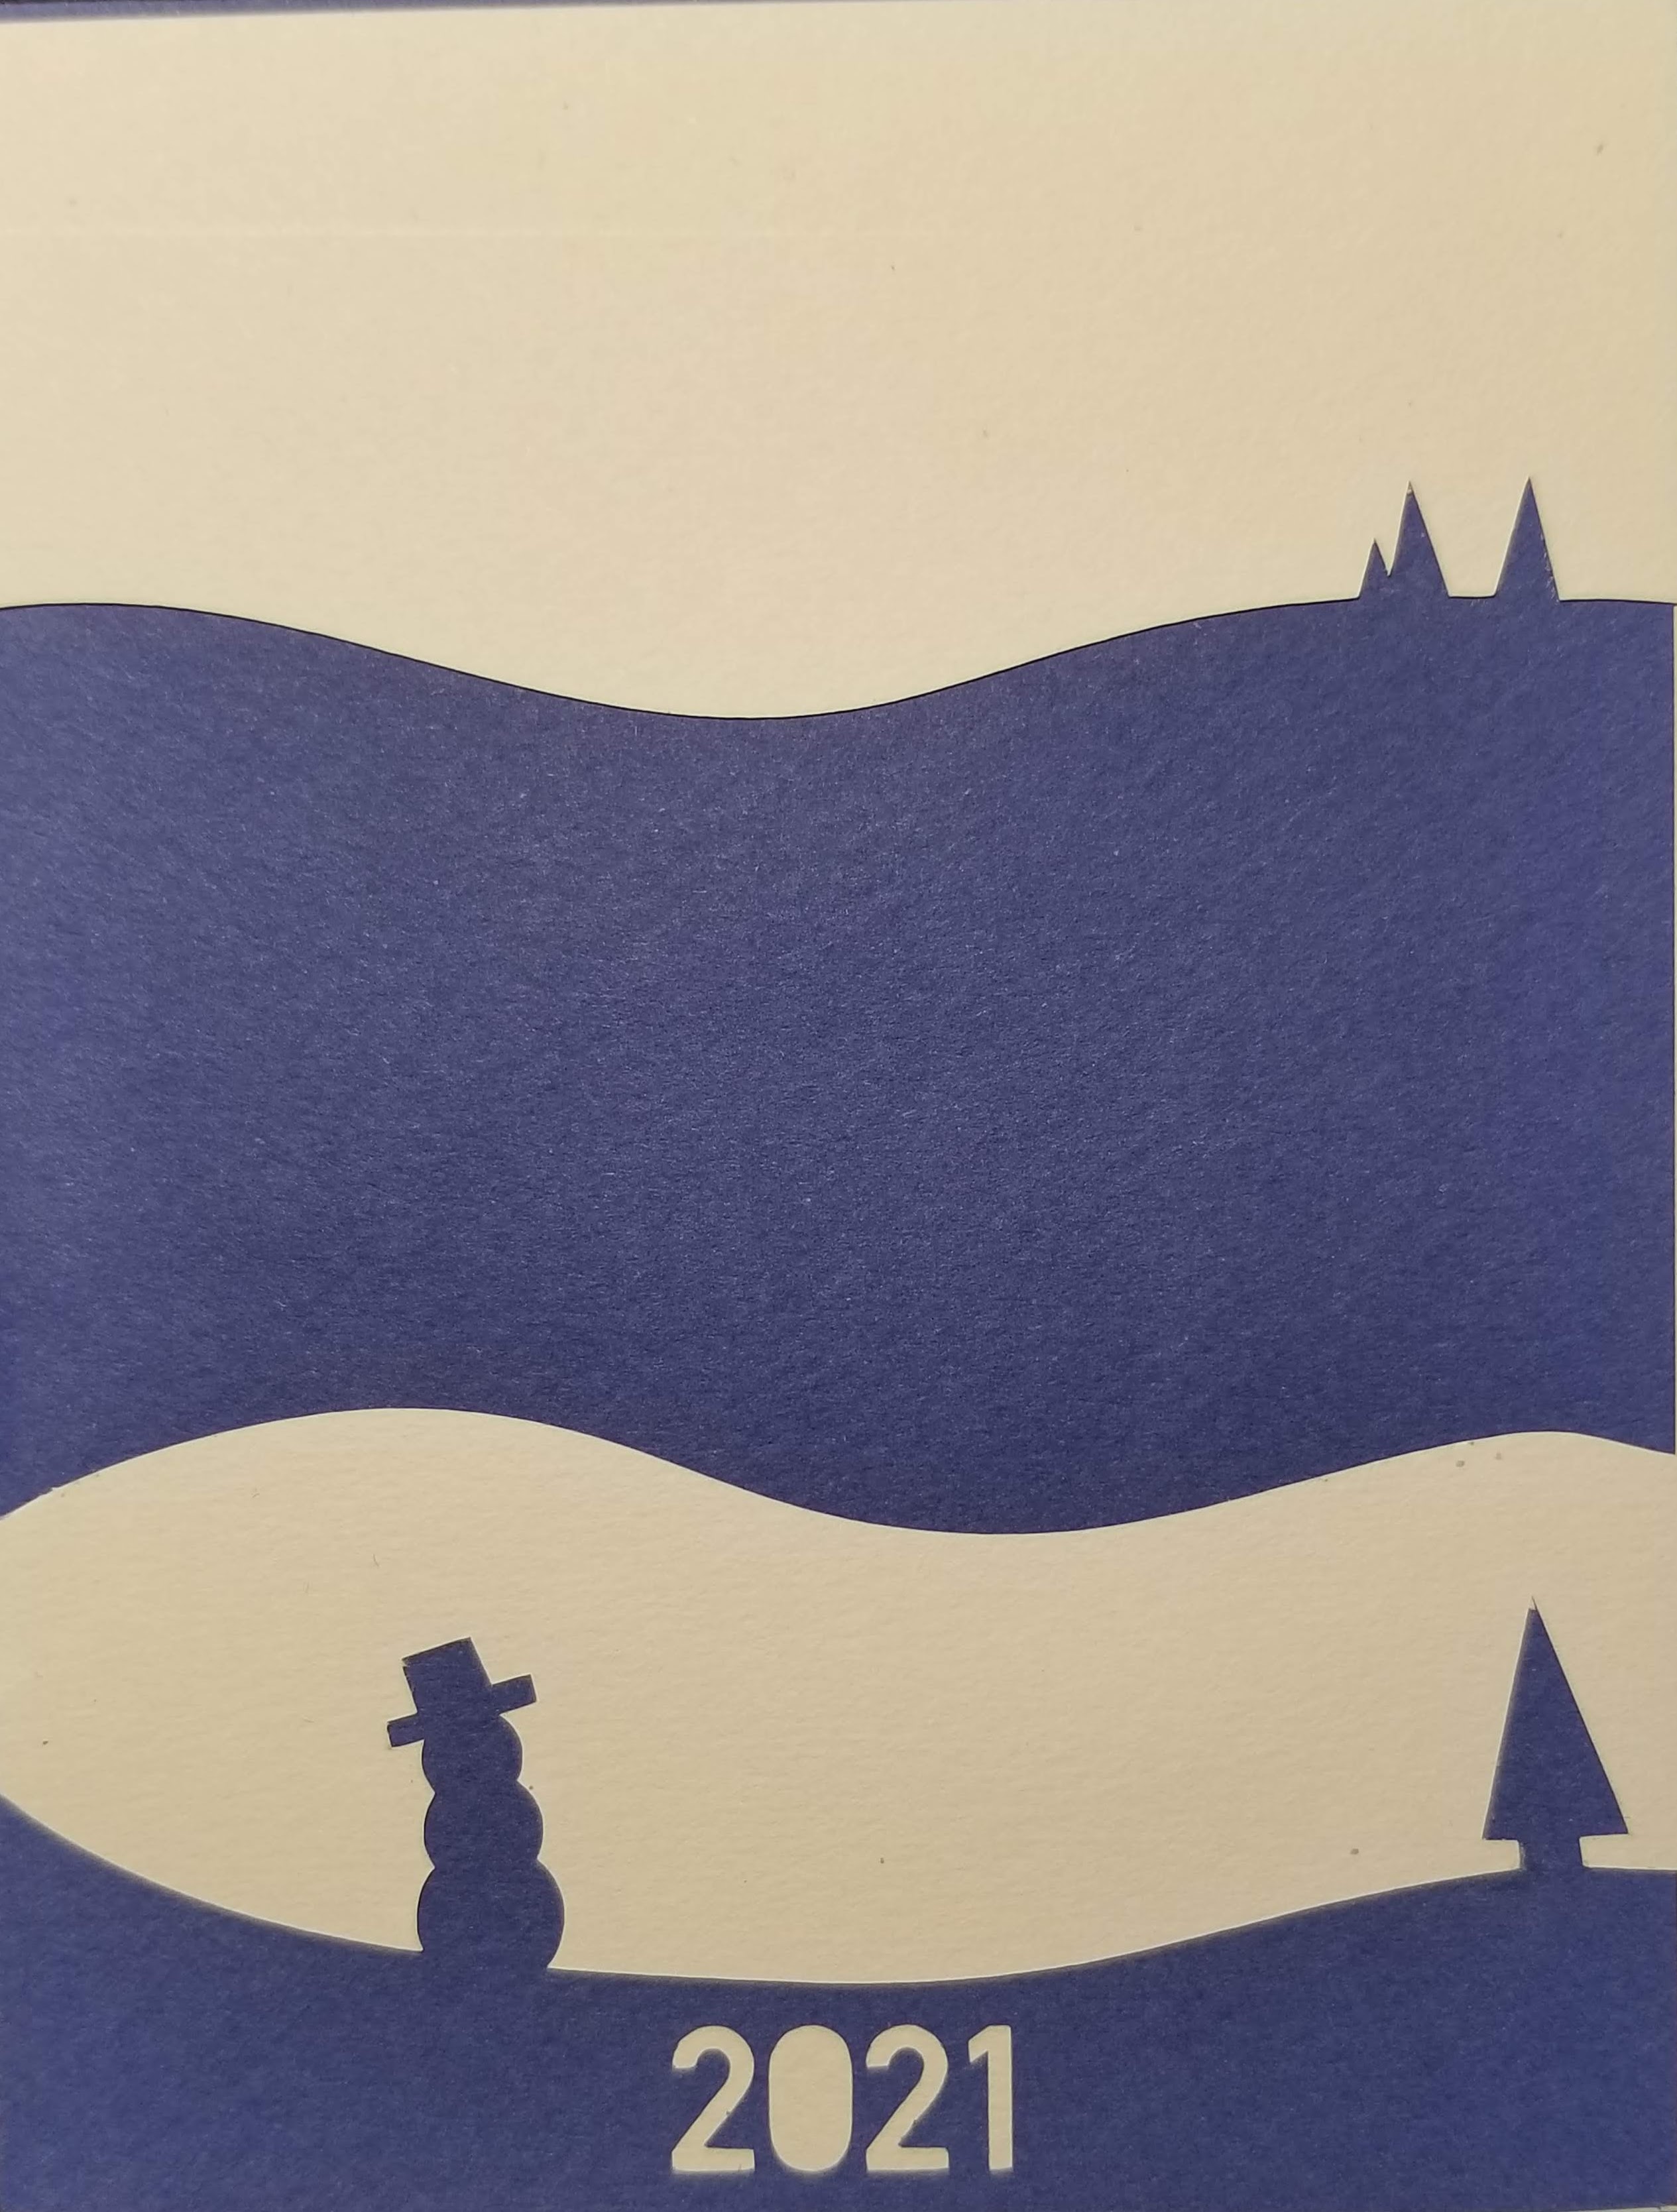
Cover
The “cover” of a 0° card is just the card in its unopened state. In this larger image, you can see the smoke and chimney are separate.
To keep the first layer closed, it has a point on the right. The layer under it has a slit that the point fits into to hold it flat, which you can see, on the right above.
Build
- 4.25” x 5.5”
- Since I made a dozen, it was designed on the computer and cut out with a Silhouette Cameo
- The paper is Canson Mei-Teintes Pearl Gray and Royal Blue.
-
Printers and cutters ↩